If you are running an e-commerce store on Shopify, you can automate your entire customer support in less than 30 seconds, literally.
Since you have already reached this page, you are smart enough to find things that can make your life better and easier. So without wasting your time with meta information, let’s begin with the actual steps involved in automating your entire customer support using AI.
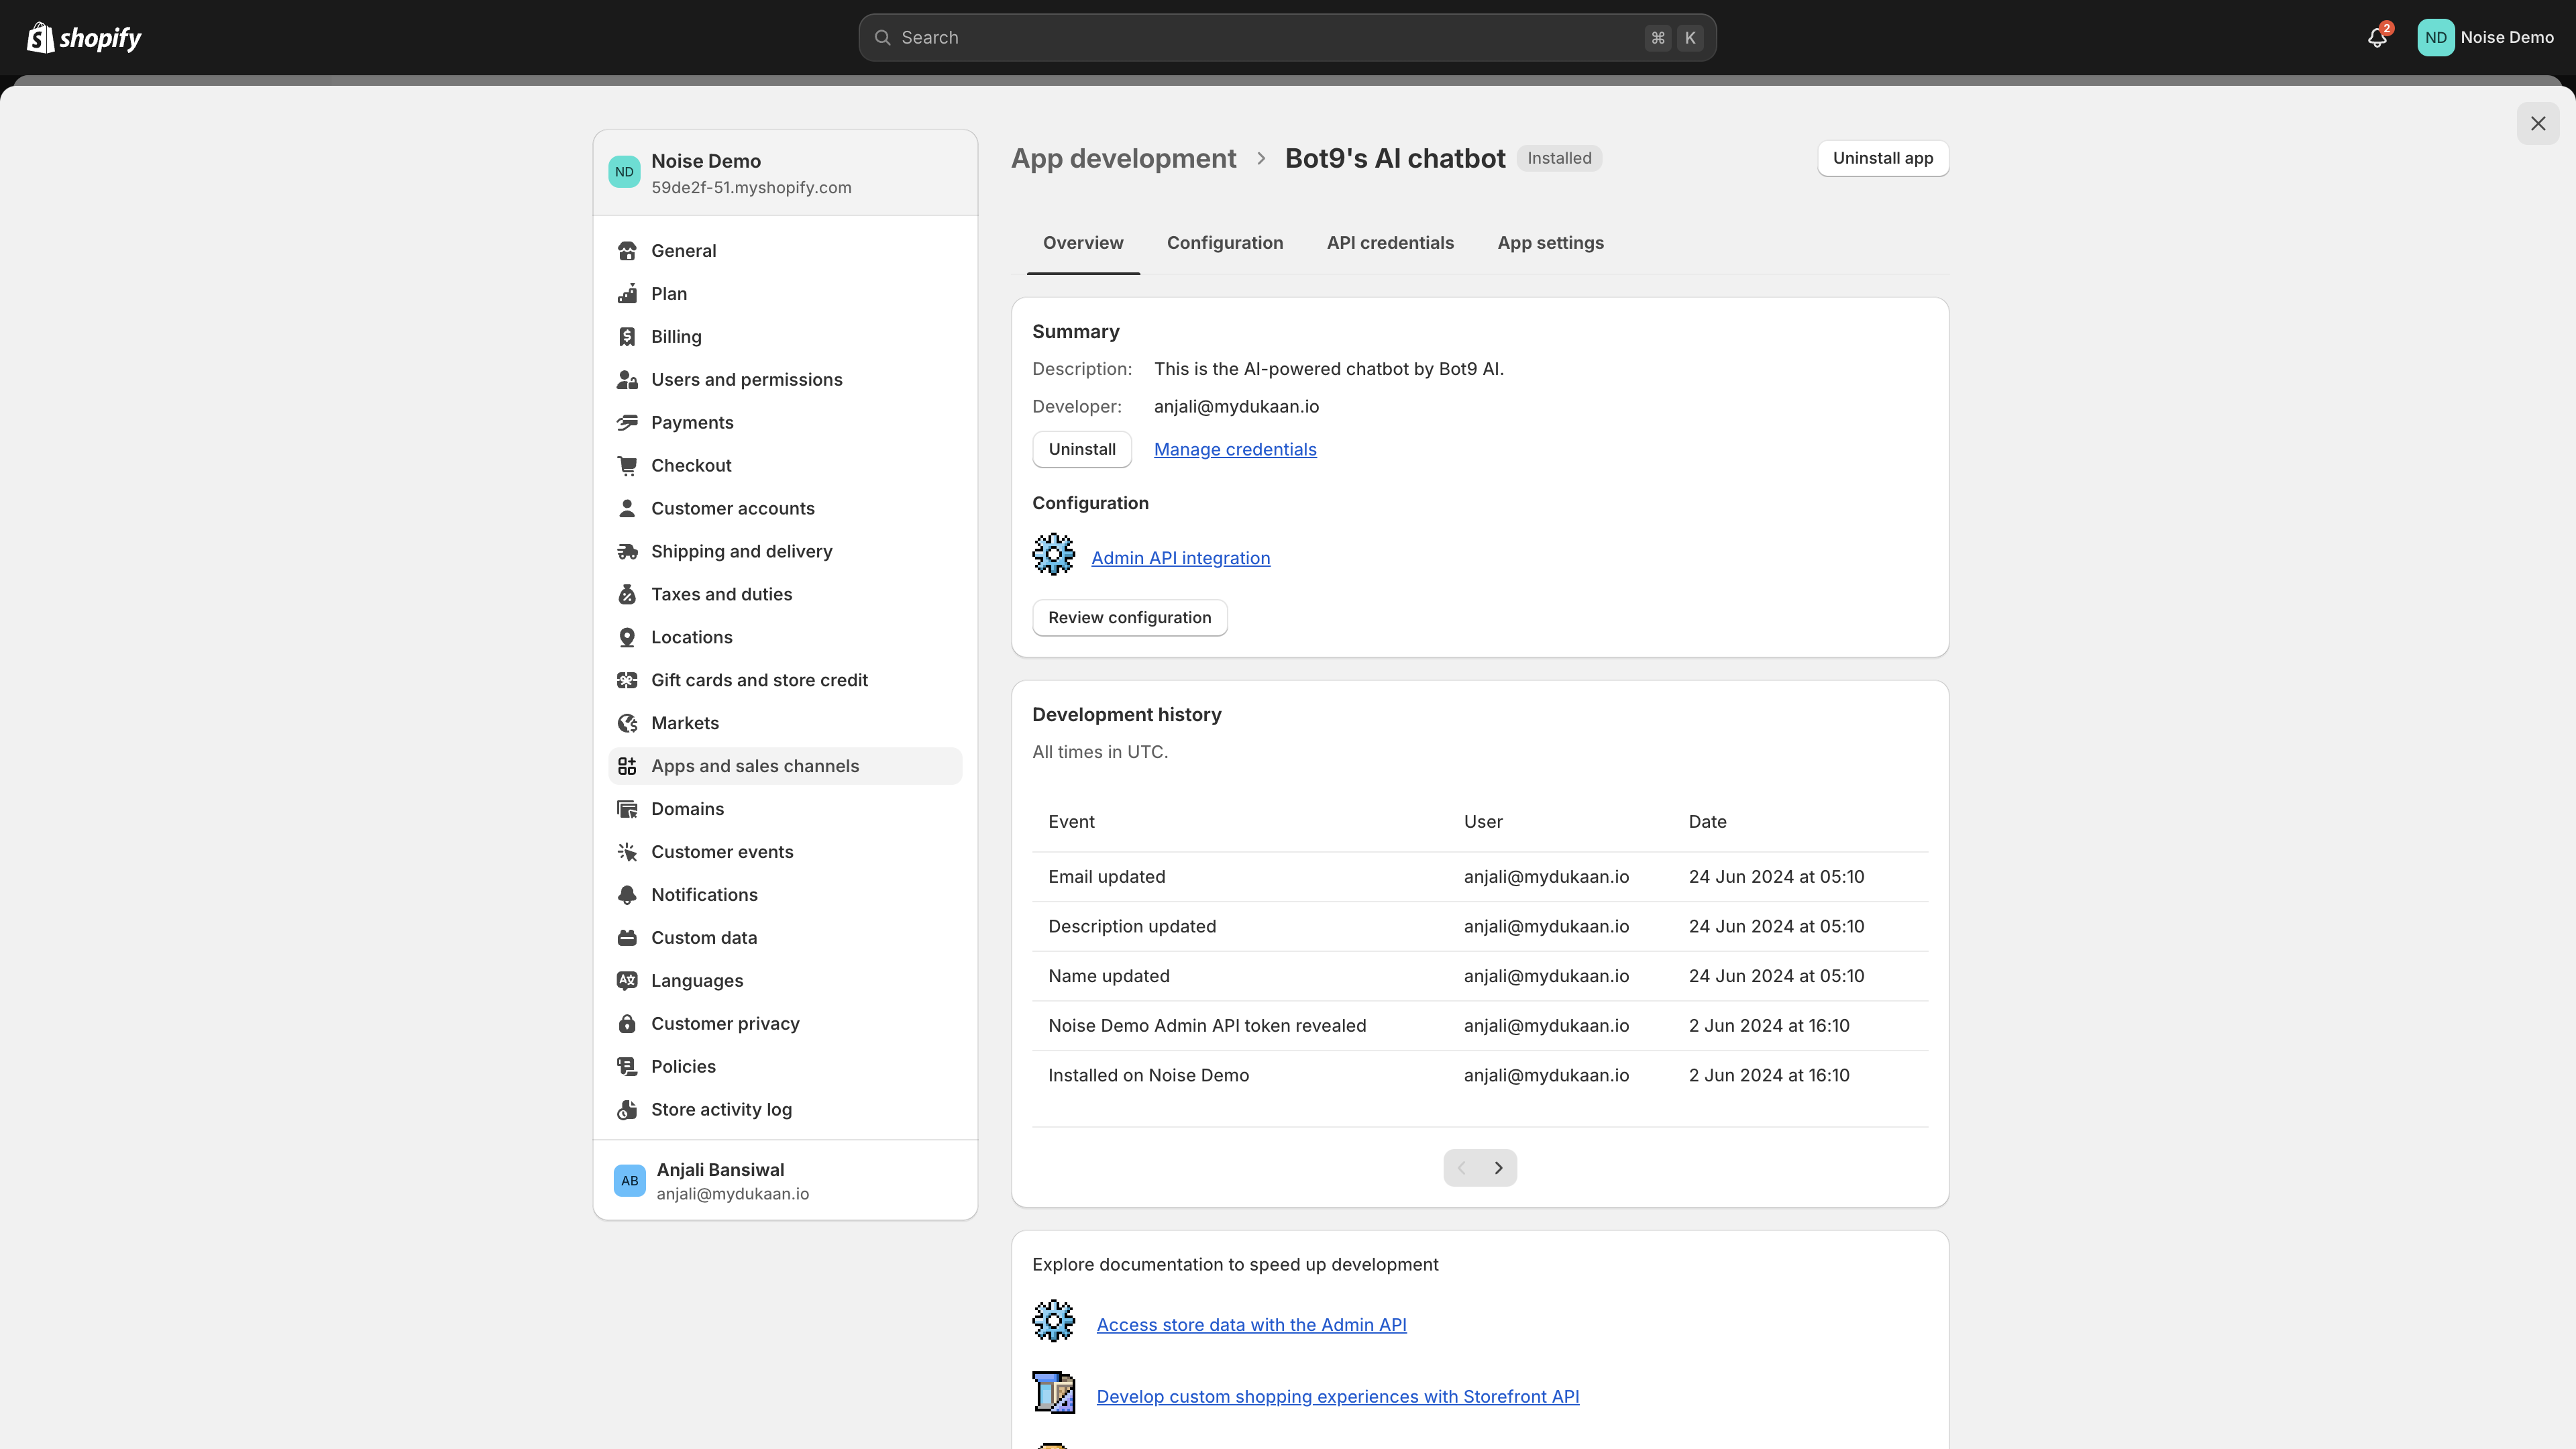
Step 1: Create a Private App in Shopify
- Log in to Shopify: Open your Shopify admin dashboard.
- Navigate to Apps: On the left-hand bottom in the sidebar, click on Settings.
- Manage Private Apps: From the menu, click on Apps and sales channels.
- Create a New Private App: Click Develop apps and then click a button that says Create an app.
- Fill in the App Details:
- Private app name: Enter a name for your private app.
- Admin email: Enter your email address.
- Set API Permissions: Click Configure Admin API scope section and grant all the permissions for the app. (e.g., read and write orders).
- Save Your App: Click on Save. Shopify will generate an API key and password. These are your Store link and Access Token. Keep them safe.
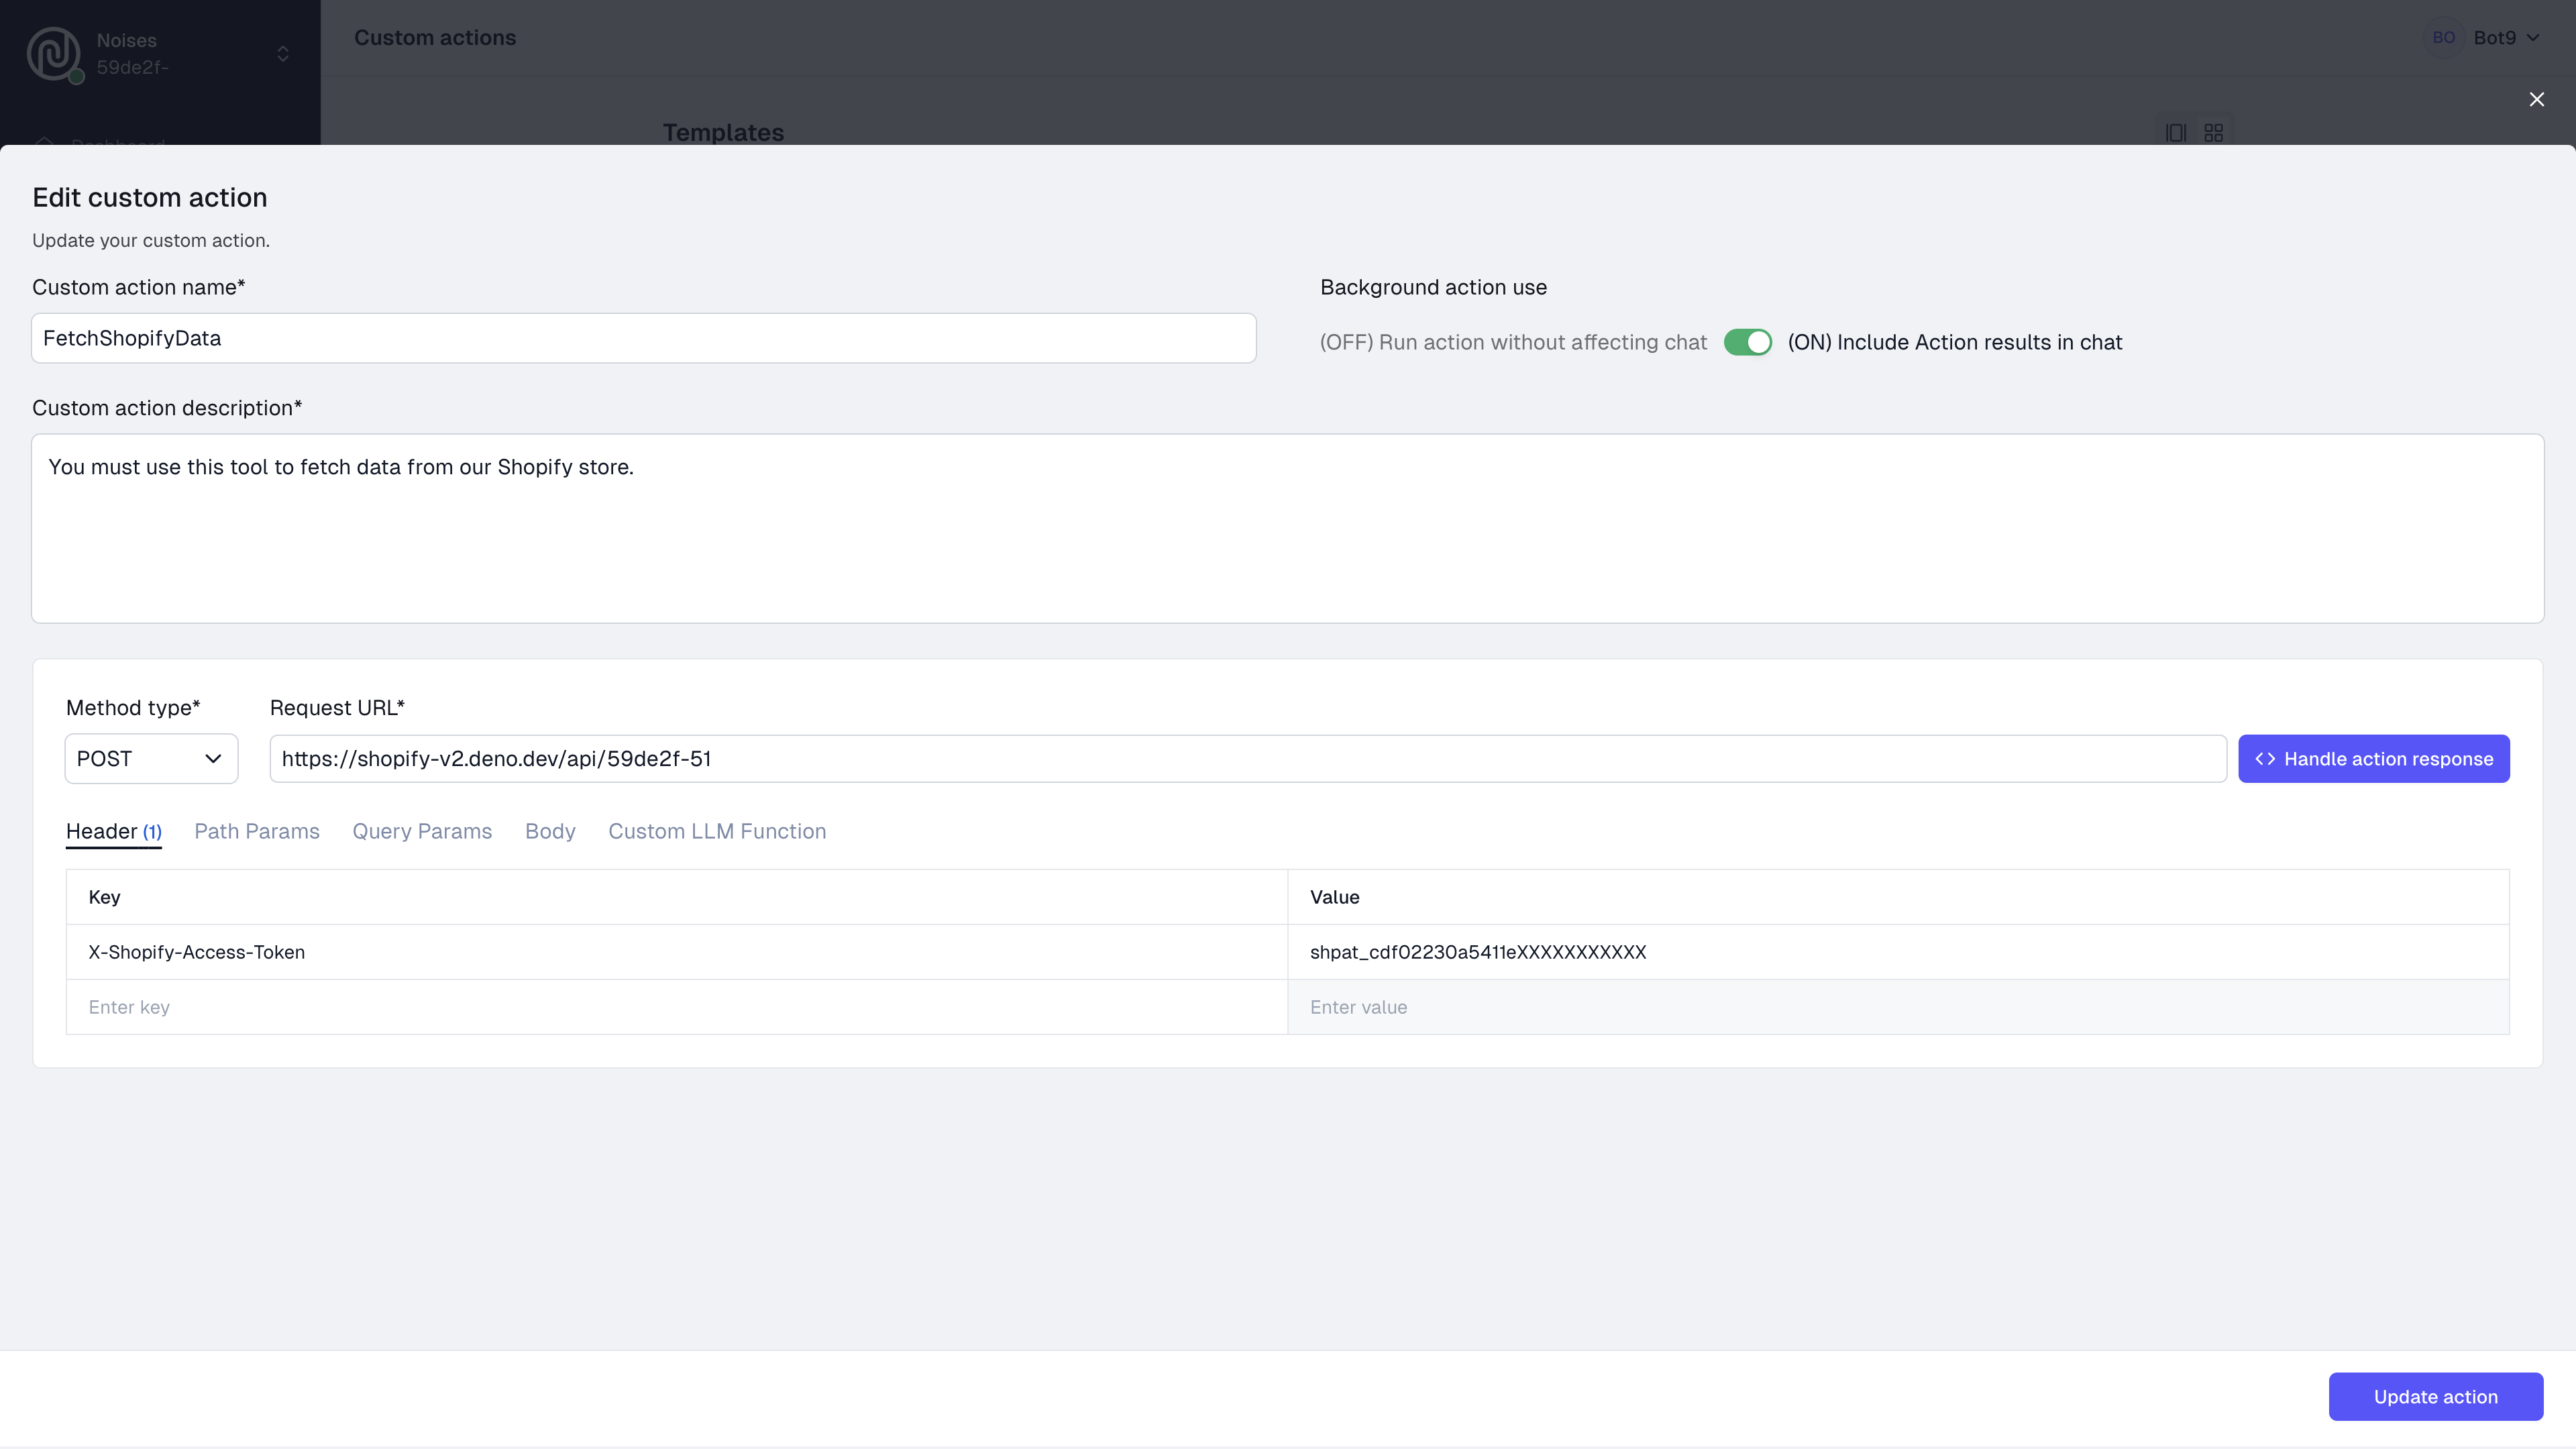
 Step 2: Create a New Custom Action
- Log in to Bot9: Open your Bot9 dashboard.
- Navigate to Custom Actions: On the left-hand menu, find and click on Custom Actions.
- Add a New Action: Click the button that says Add New Action.
- Fill in the Details:
- Custom action name: Enter
FetchShopifyData. - Custom action description: Enter
You must use this tool to fetch data from our Shopify store. - Method type: Select
POSTfrom the dropdown menu. - Request URL: Enter this the request url field, make sure to replace your-store-name with actual store name: https://shopify-v2.deno.dev/api/
your-store-name. Here's an example of a correct link: https://shopify-v2.deno.dev/api/90c81c-e3 - Header: Click on the Headers tab and enter the key-value pair for your Shopify Access Token. The key should be
X-Shopify-Access-Tokenand the value should be your actual Shopify API access token, from the Step 1. - Custom LLM Function: Copy and paste the full instruction content from here.
- Custom action name: Enter
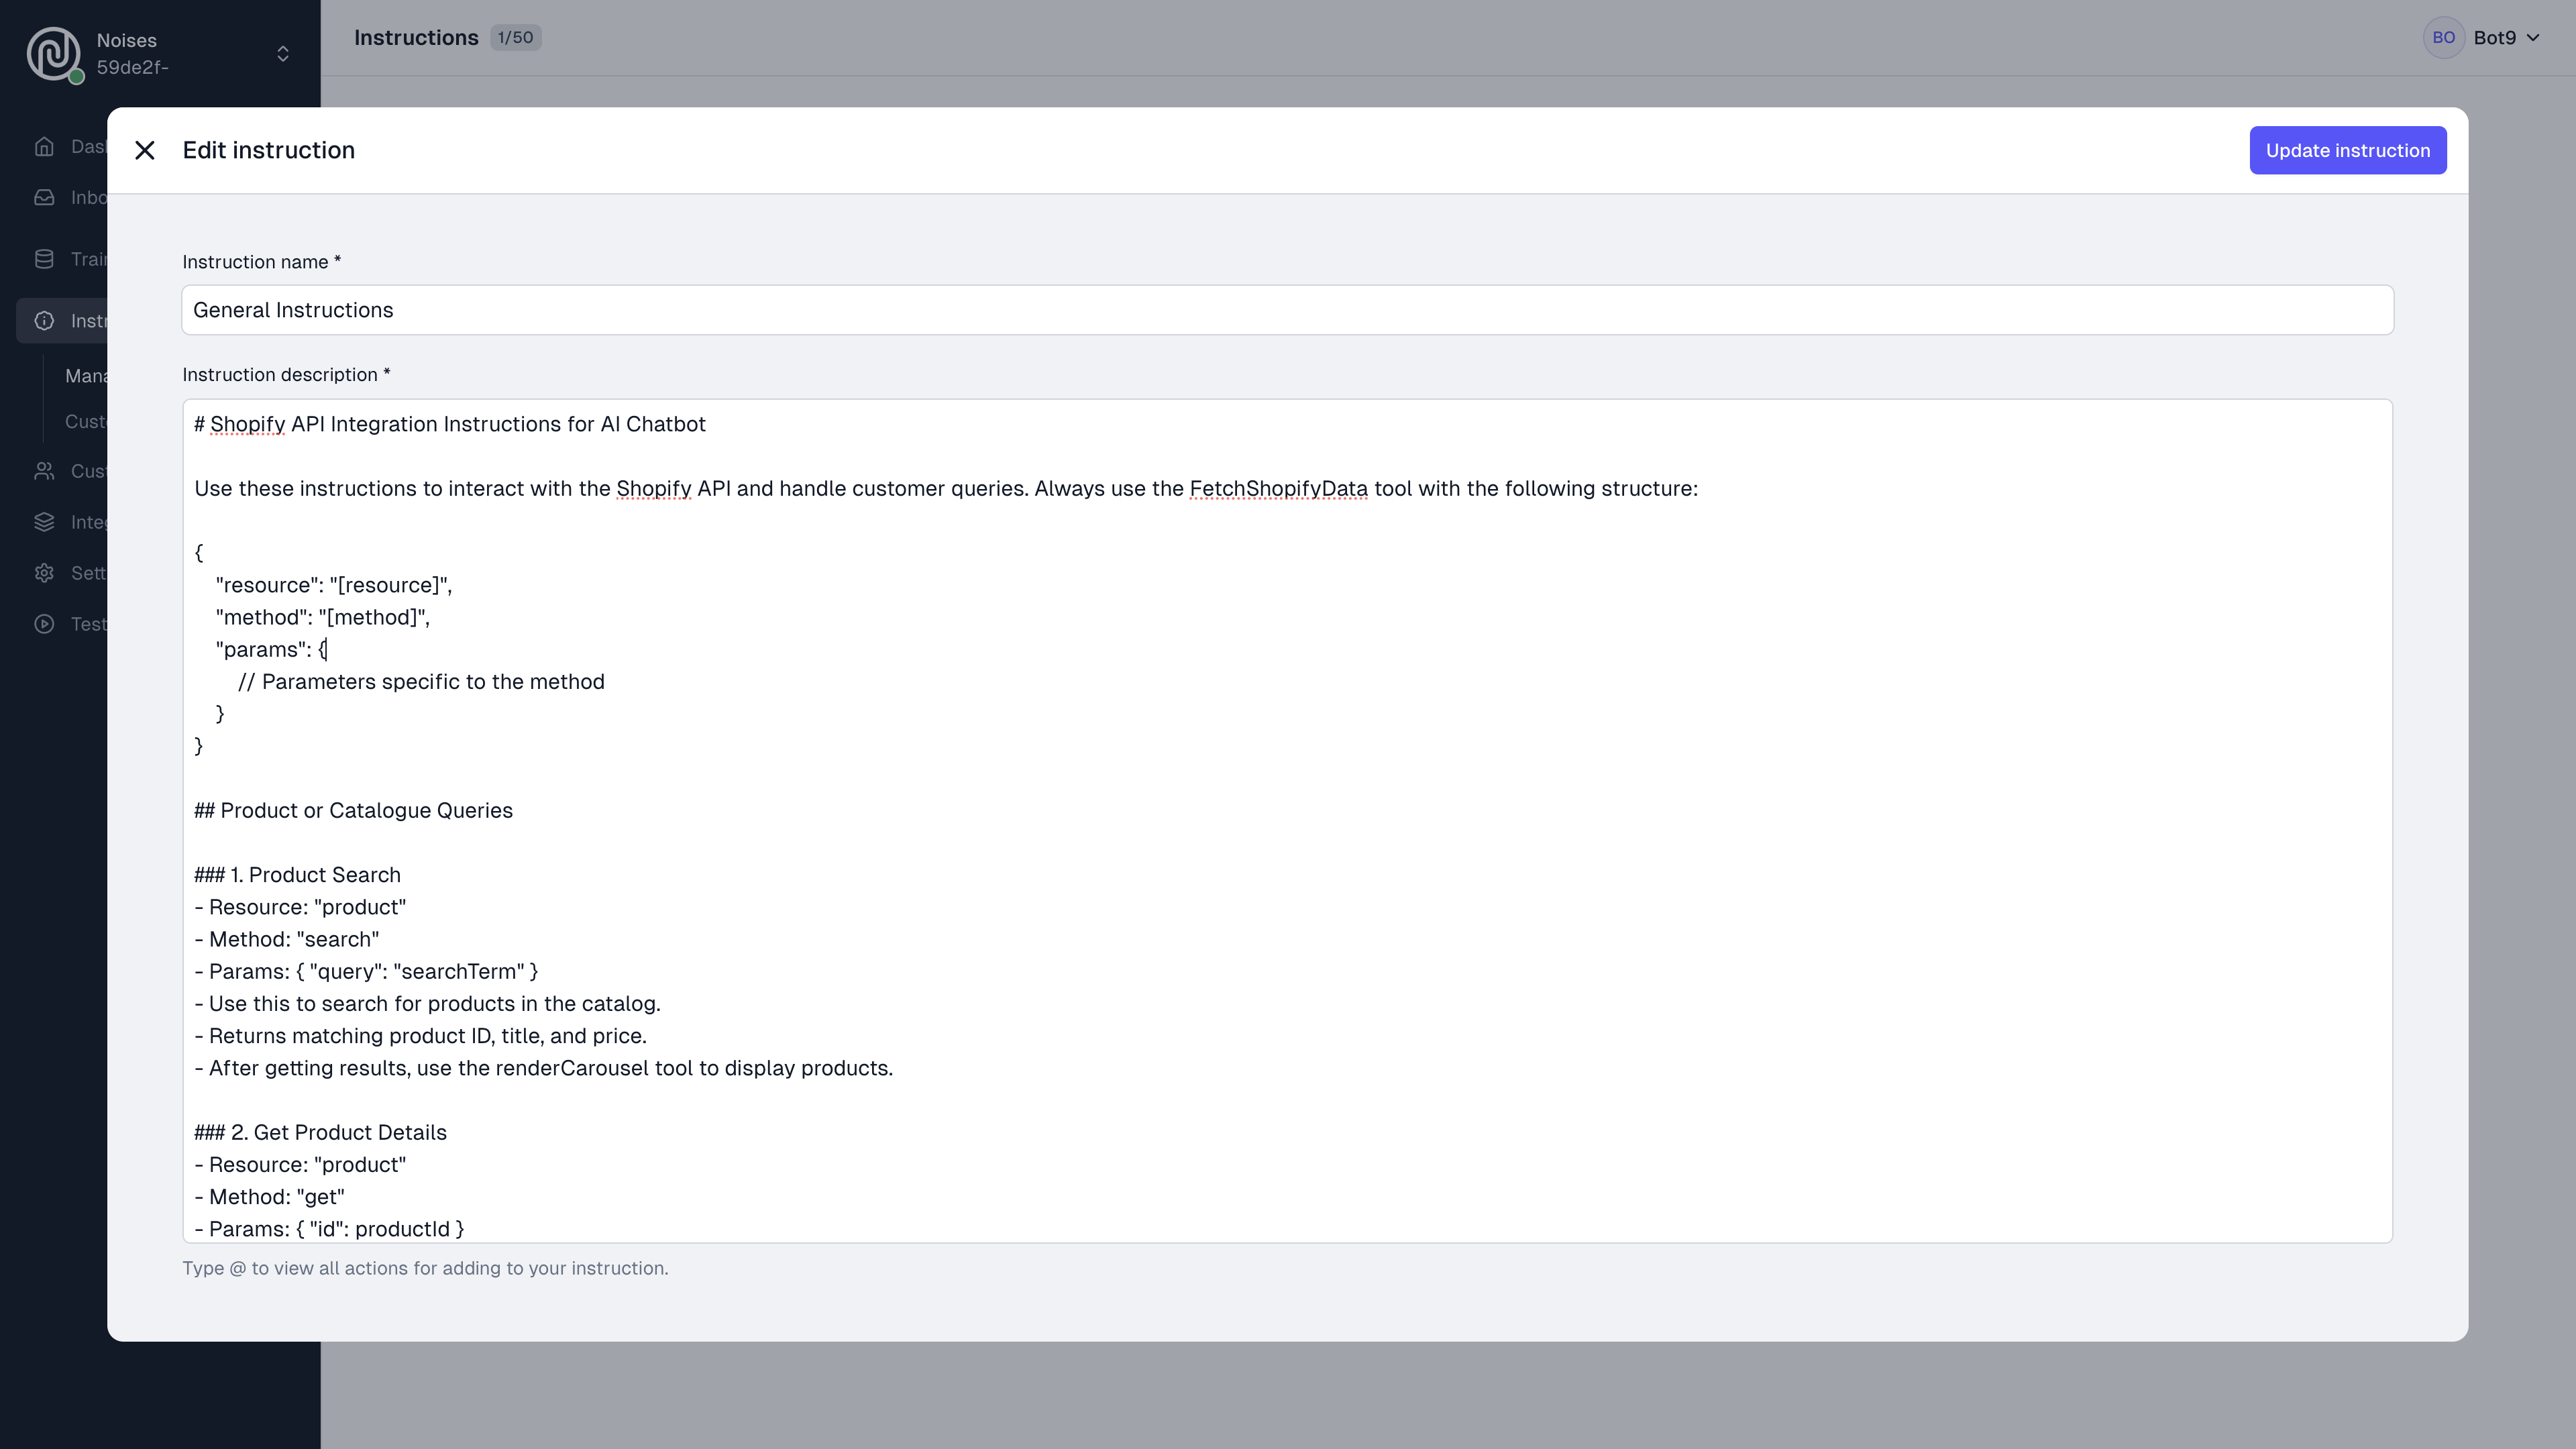
 Step 3: Create an Instruction in Bot9
- Go to Instructions: In the Bot9 dashboard, click on Instructions on the left-hand menu.
- Add New Instruction: Click the button that says Add new instruction.
- Enter Instruction Details:
- Instruction Name: Enter a name for your instruction.
- Instruction Content: Copy and paste the full instruction content from here.
- Save Instruction: Click on Save to store the instruction.
 Step 4: Test the Bot
Now it’s time to see the magic happen. Click on Test your bot from the sidebar menu of Bot9 and start asking any questions you think your customers might ask. Here’s an example:
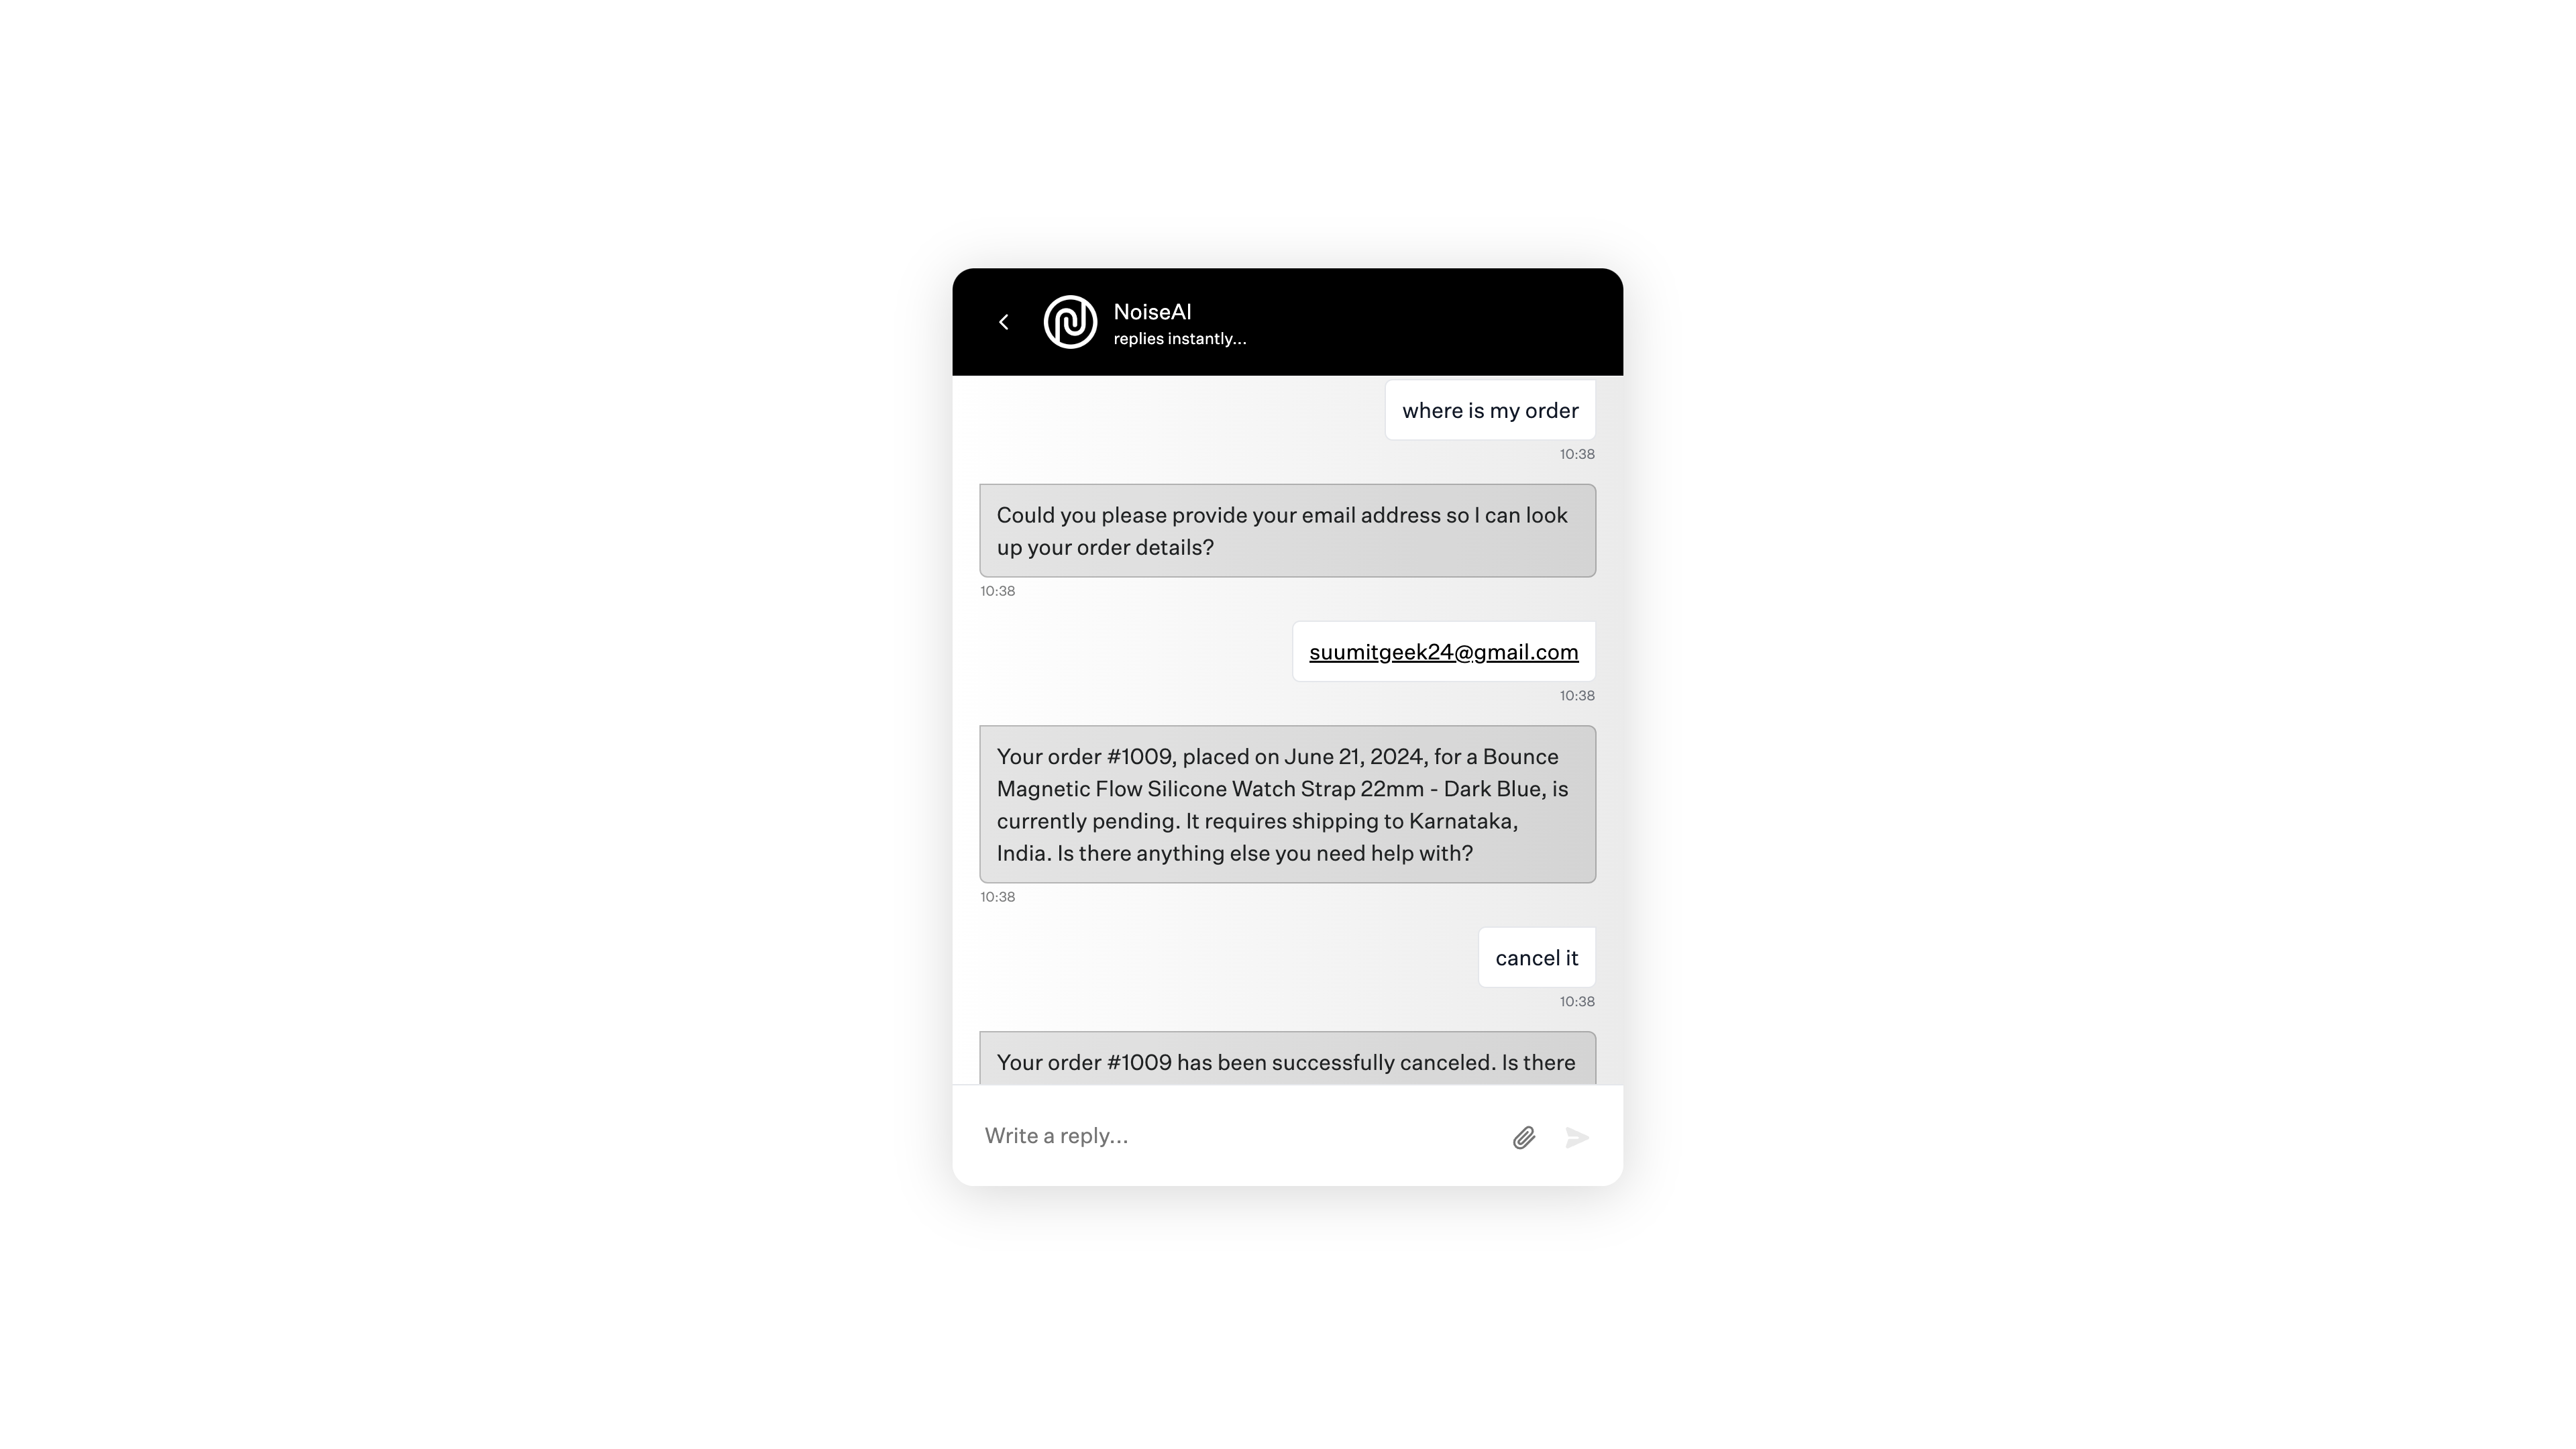
Example 1: Order Status Query
- Customer Inquiry: A customer asks, “Where is my order?”
- Bot Response: The bot fetches the order details from Shopify and responds with the current status.
- The bot will ask for the customer’s email address to look up their order.
- Once the email is provided, the bot retrieves the order information from Shopify.
- The bot then informs the customer about the current status of their order.
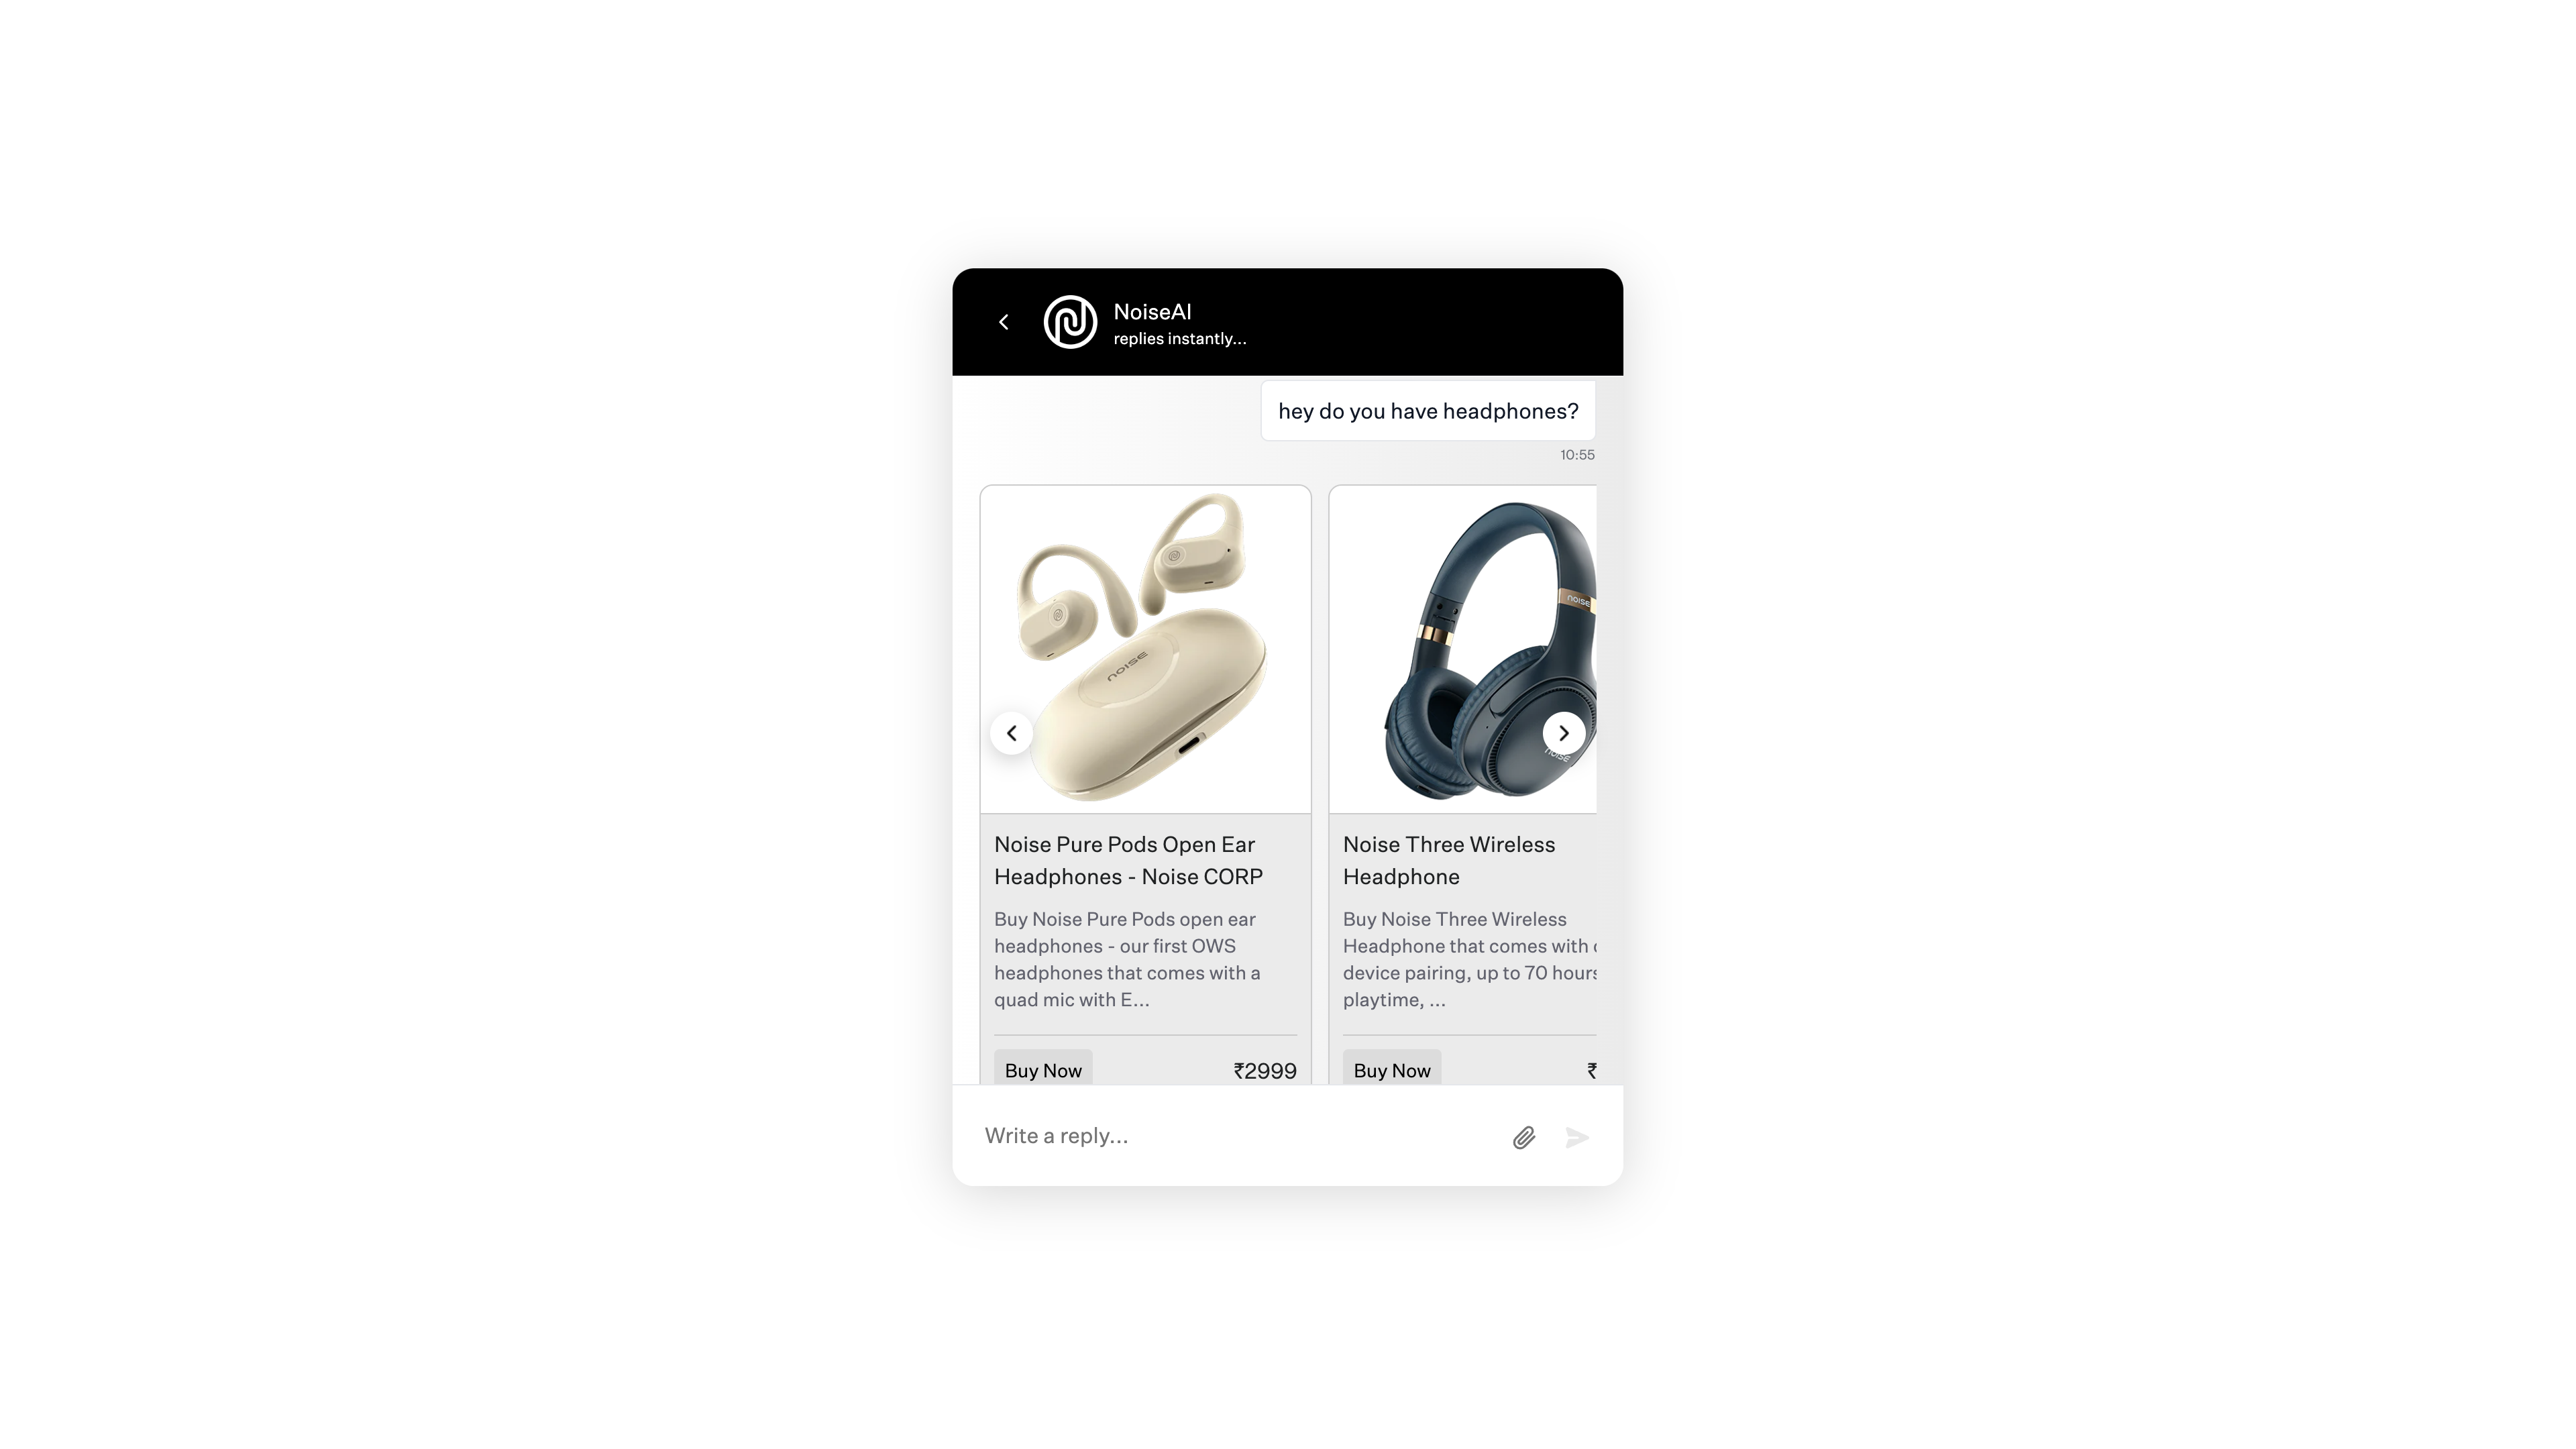
 Example 2: Product Inquiry
- Customer Inquiry: A customer asks, “Do you have headphones?”
- Bot Response: The bot retrieves product information from Shopify and displays the available options.
- The bot will search the Shopify store for products related to headphones.
- It will then display a list of available headphone products to the customer.
 Disclaimer
The store shown in the testing examples is a dummy store created for demonstration purposes only. It is not a real store and is used here to illustrate how the Bot9 AI chatbot interacts with Shopify. For real product purchases, please visit gonoise.com
And that’s it! You’ve successfully automated your Shopify customer support using Bot9 AI. Now sit back and let the bot handle the queries while you focus on growing your business.
