Custom Actions are predefined operations that your chatbot can execute when specific conditions or triggers occur during a conversation.
Embarking on the journey of Bot9's capabilities, we introduce you to the power and flexibility of custom actions, starting with a fundamental yet impactful task: sending emails using your own SMTP server.
This guide is designed to seamlessly walk you through the process of creating your first custom action on Bot9, utilizing Postmark as your chosen SMTP service.
Whether you're looking to notify your human agent about a specific type of conversation, or sending an email to product team whenever someone is suggesting a new feature, or trigger personalized emails based on user interactions, this guide lays down the foundational steps to integrate custom email actions into your bot's repertoire.
Before we begin creating your custom action for sending emails on Bot9 using Postmark's API, let's ensure you have everything needed to proceed smoothly:
Bot9 Account: Make sure you can access your Bot9 dashboard to manage and create custom actions.
Postmark Account: You'll need an active account with Postmark. Ensure you have access to your server API token, which will authenticate your requests to send emails.
API Token: Your Postmark server API token is crucial for authentication and authorization when making API calls to send emails.
Let's dive in and unlock the potential of custom actions together, starting with sending emails using your own SMTP on Bot9.
Step 1: Initiate Custom Action creation
Navigate to your Bot9 dashboard.
Go to
Instructions>Custom Actions.Click on the
+Add actionbutton to start.
Step 2: Configure your Custom Action
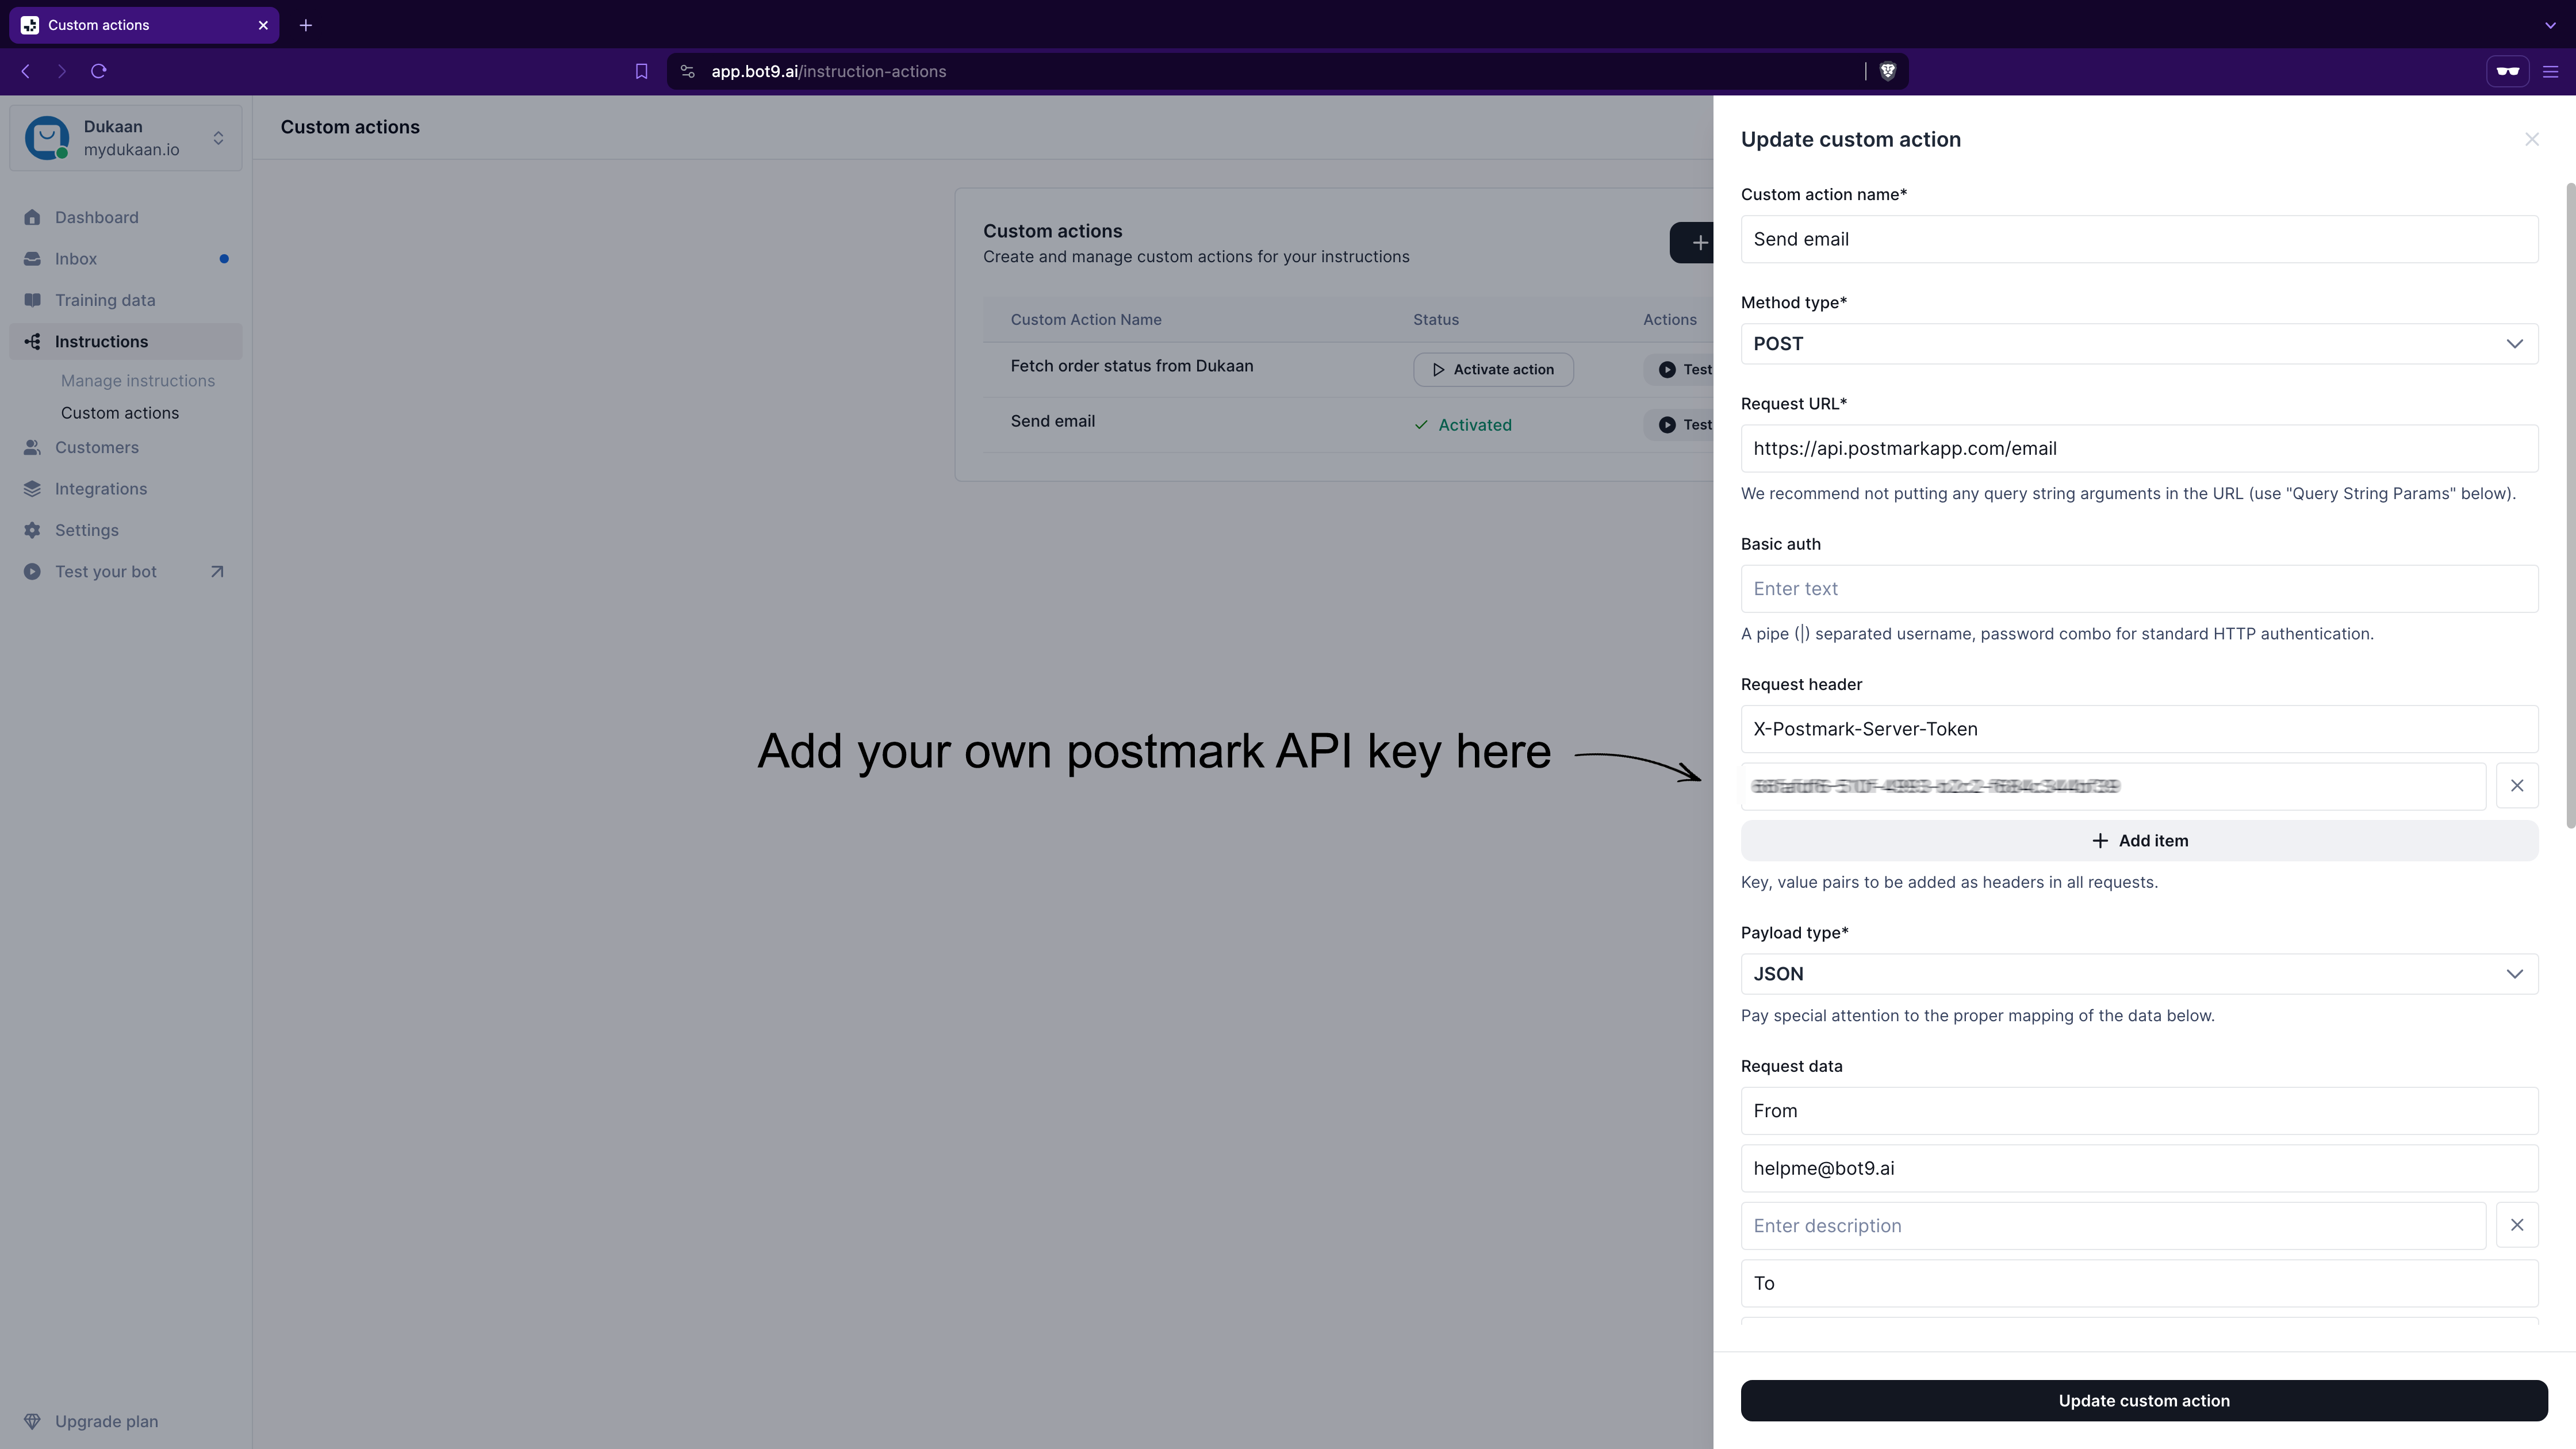
Action Name: Give your action a descriptive name, like "Send Email via Postmark".
Method Type: You have three options—GET, POST, PUT. Briefly,
GETretrieves data from a specified source.POSTsends data to a server to create/update a resource.PUTreplaces all current representations of the target resource with the request payload.
Import from curl (Optional): Paste a curl request if you have one ready.
Using "
POST" to send emails through an API means you're telling the server to create or update data, which in this case is the action of sending an email with the details you provide, like the recipient's address and the email content.
Step 3: Fill in the details
Request URL: Enter the Postmark API endpoint for sending emails, which is. Avoid query strings here.Basic Auth: You don’t require this when using Postmark for sending emails.Request Header: Add necessary headers suggested by Postmark on this page: https://postmarkapp.com/developer/api/email-apiPayload Type: Select JSON.Request Data:Structure your JSON payload according to Postmark's requirements. Include keys for From, To, Subject, and HtmlBody or TextBody.Background Action Use: Toggle [ON] to include action results in chat or [OFF] for background operations like logging.
Step 4: Test and Activate
Test your action by clicking the
Test actionbutton that will appear in front of the Custom Action name over here: https://app.bot9.ai/instruction-actions. You may need to provide test data.Once tested successfully, your custom action is ready to be integrated into your bot's workflow.
Step 5: Integration 🚨 Important
Attach the custom action to a relevant instruction within your bot's conversation flow to trigger it based on user interactions.
Now let's see if things are working as intended, and in order to test that we will have to attach this newly created custom action to the instruction.
Let's consider a real-world use-case, I want to notify my product team whenever someone is suggesting a feature, and while someone is suggesting a feature, I want to ask them to explain their use-cases.
So here's a simple instruction I added:
Instruction Name: Notify product team about new feature suggestion
Instruction: If someone suggests or asks about the feature or functionality or plugin or theme that is currently not available, ask them to explain the use-cases for thething that they're suggesting and ask for their email ID to put them in touch with product team.
Action: Send Email via Postmark
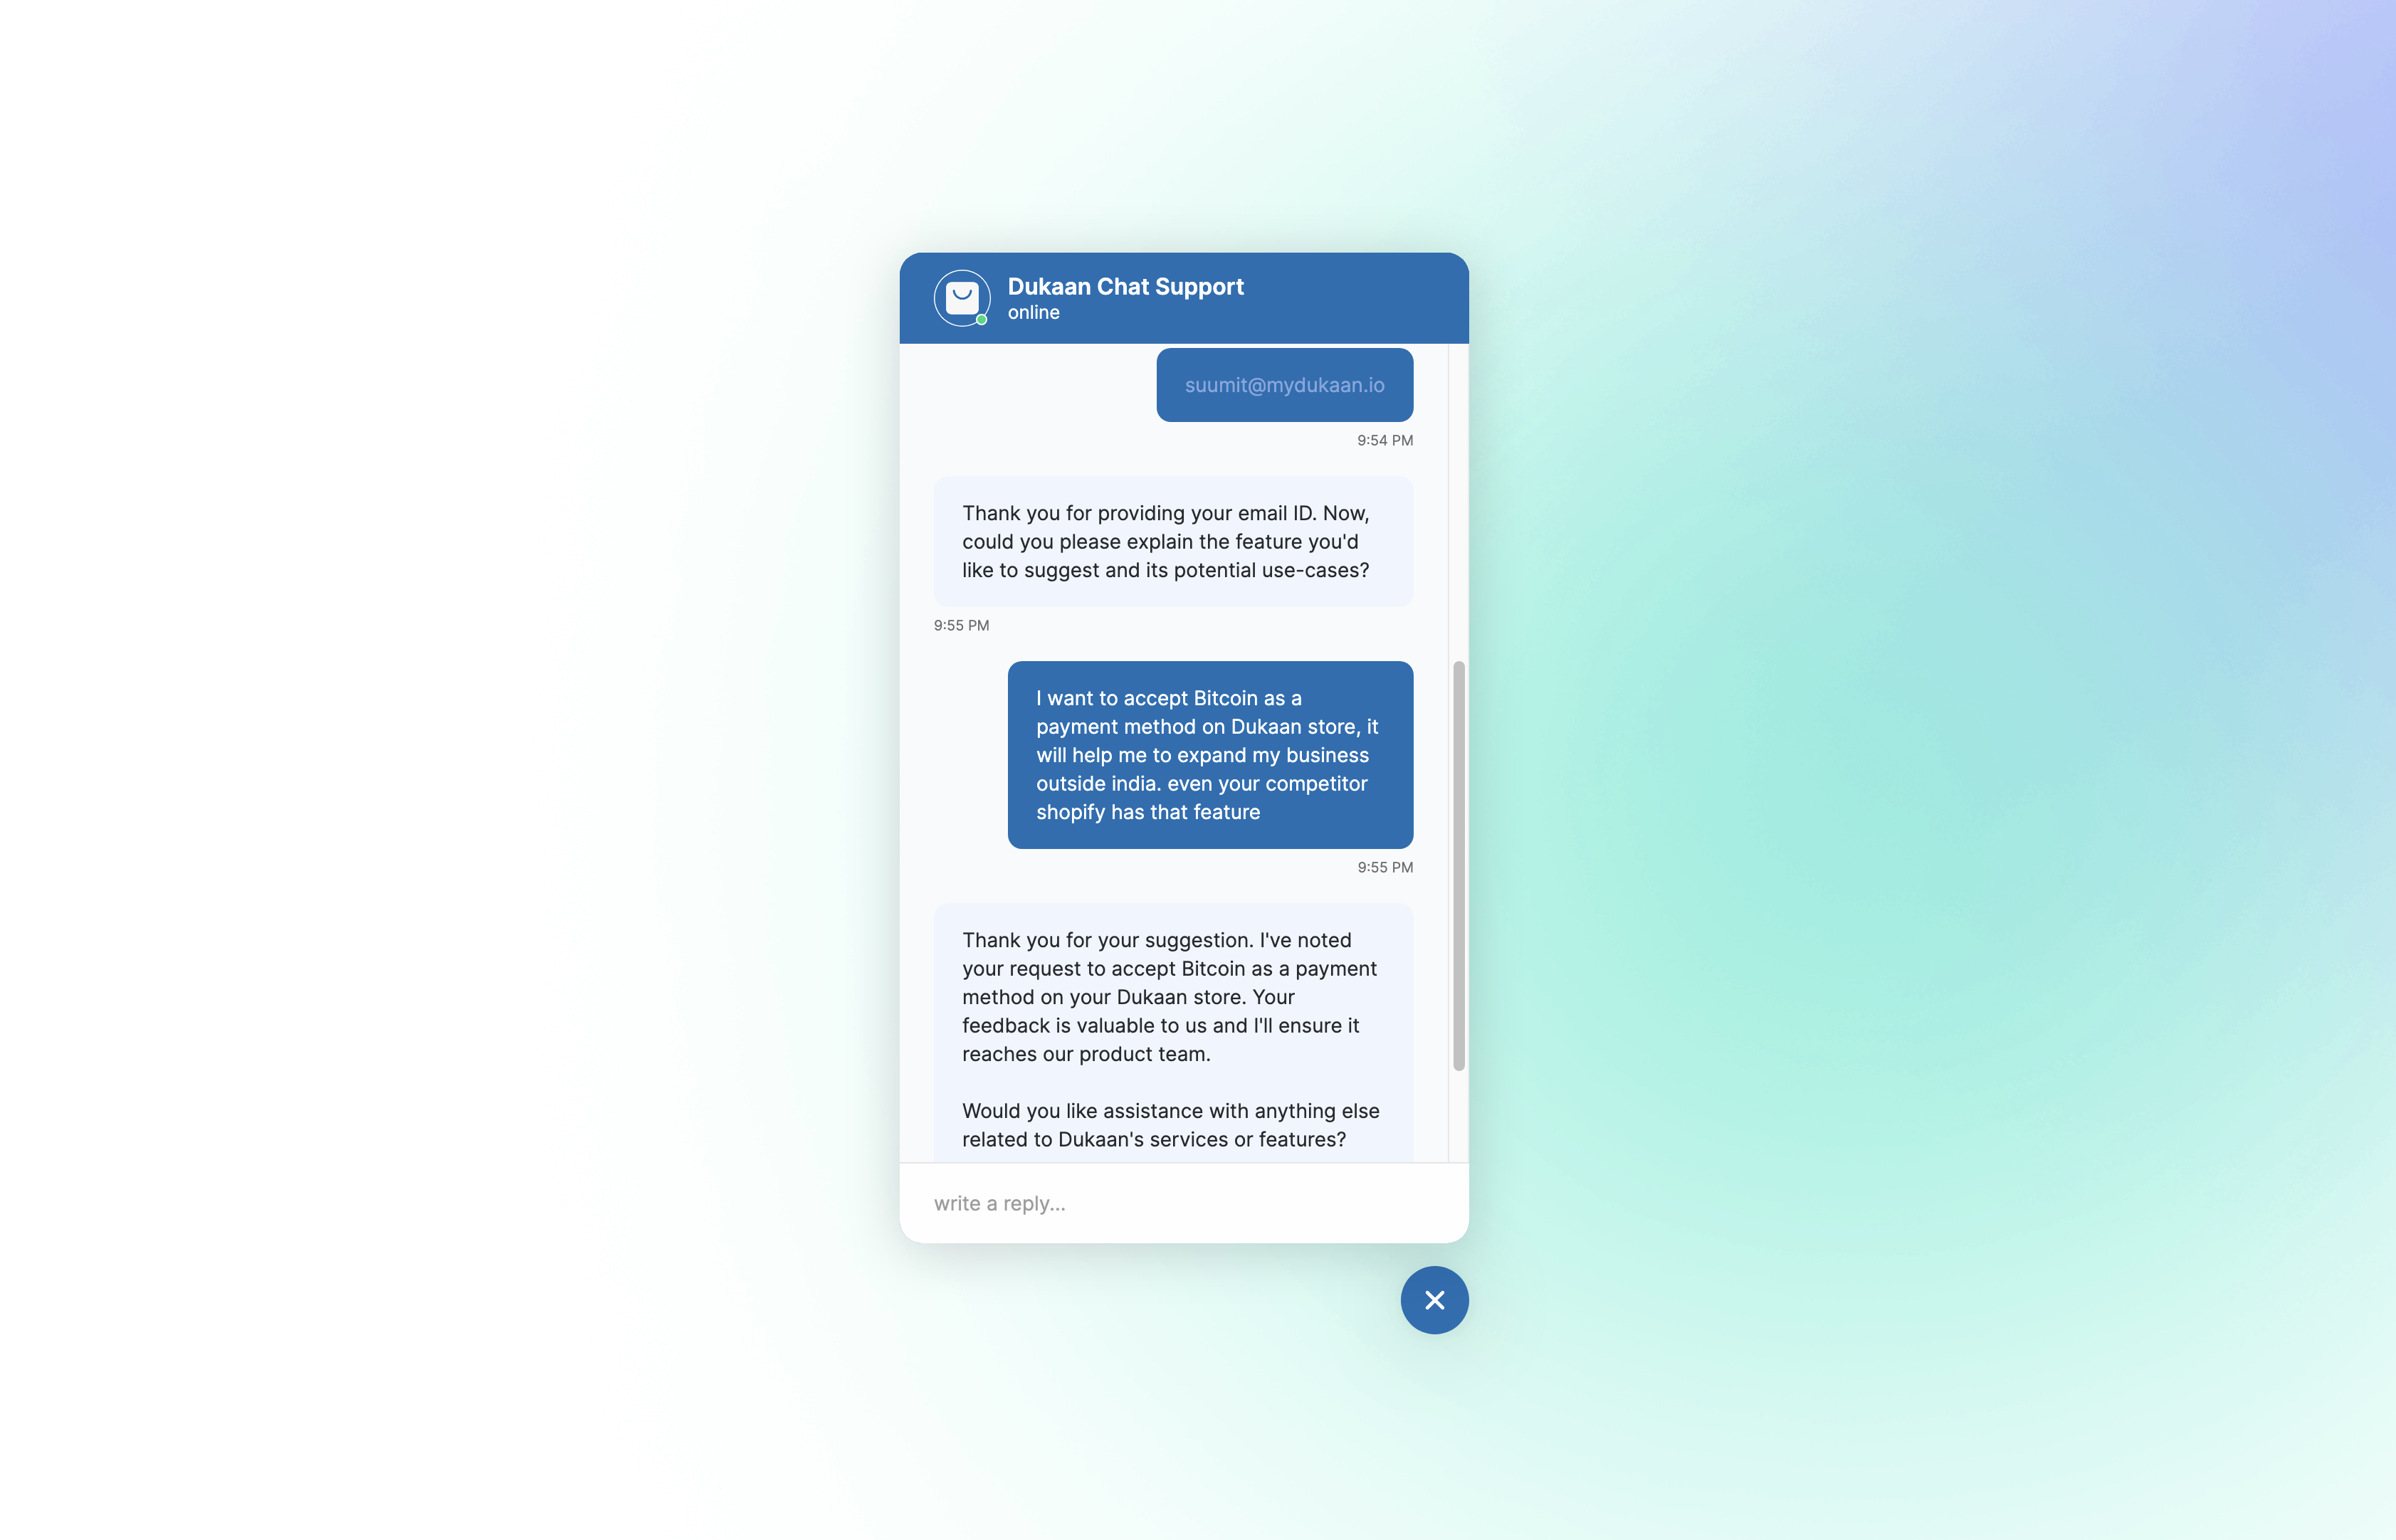
Let's test this out, I'll suggest a feature on live chat, that is powered by Bot9.

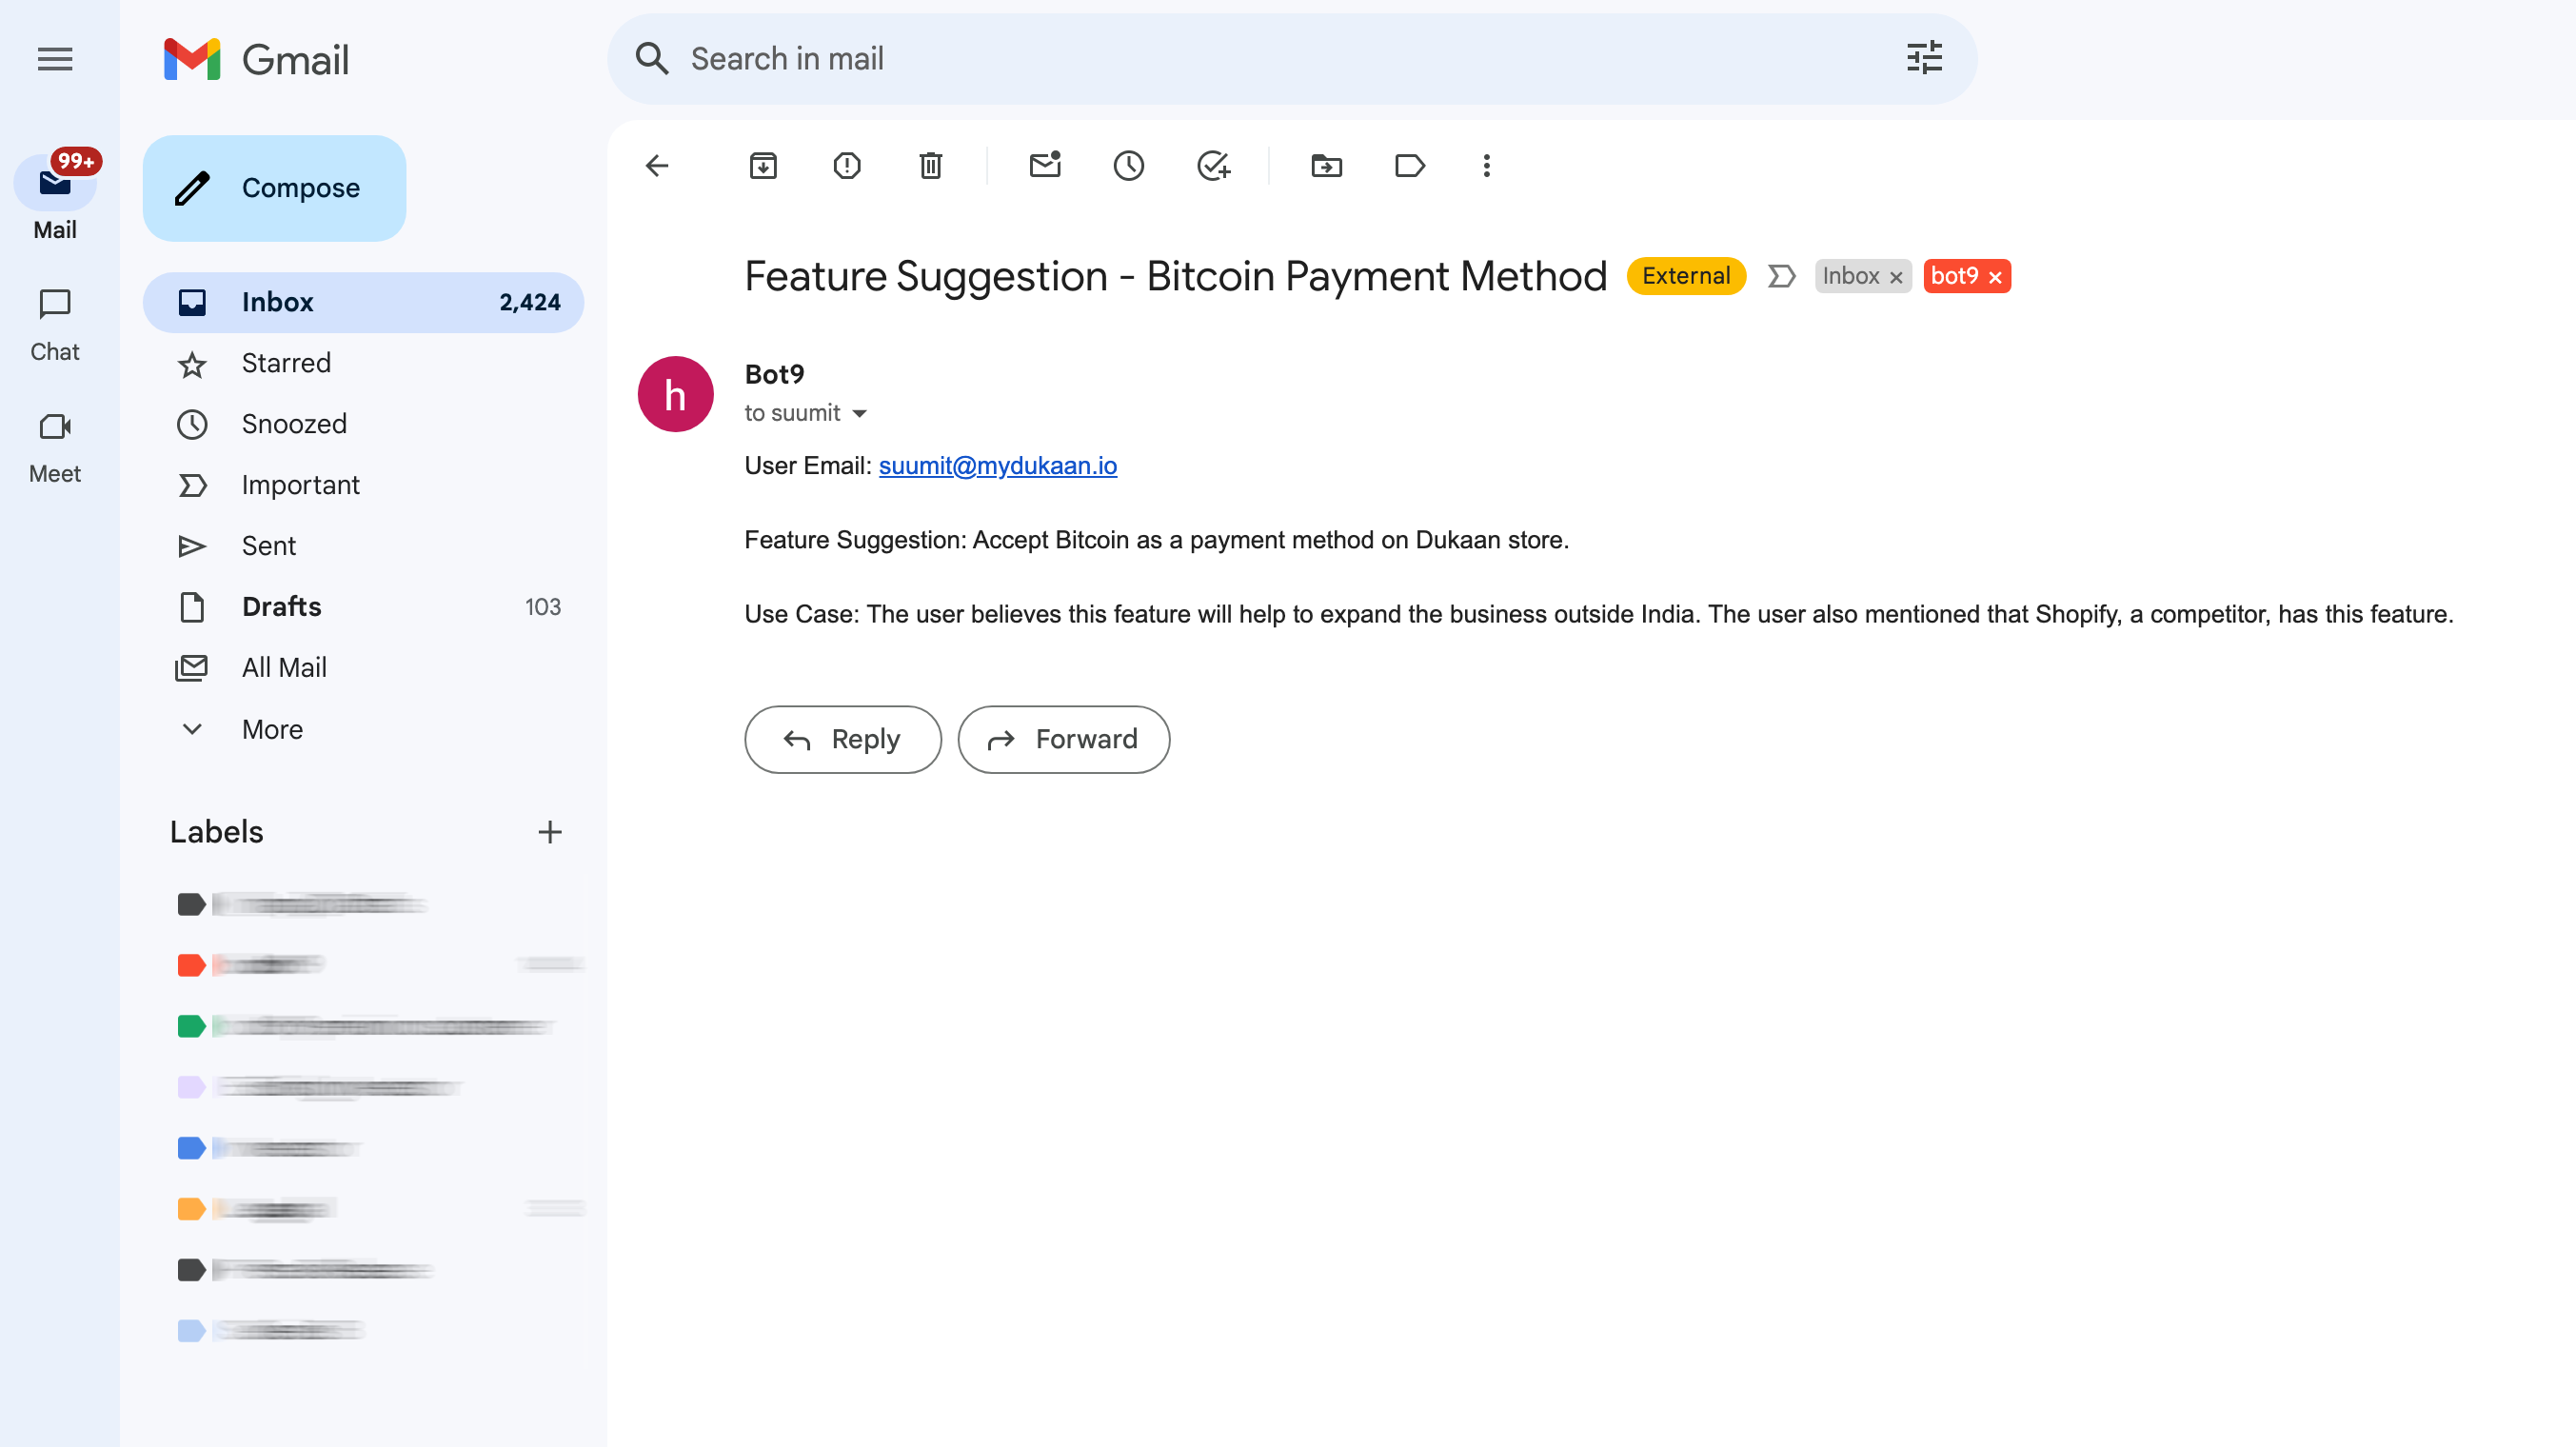
Now as soon as this instruction gets triggered, an email will be sent out immediately.

Congratulations! You've now set up a "Send Email" custom action using Postmark.
This custom action now automate email sending in response to user interactions, saving time and providing a seamless experience for both your team and your users.
Configuring data payloads with variables
The "Request data" section in a custom action is where you define the data that will be sent to an external service or API when the action is triggered. This section typically consists of key-value pairs that represent the data structure of your request.
Understanding key-value pairs:
Key: This is the name of the data field that your external service or API expects. For an email action, common keys could be "From," "To," "Subject," and "TextBody."
Value: This is the actual data or content that corresponds to the key. It can be a static value that you enter directly, or it can be a dynamic value that is filled in at runtime using variables.
Using variables:
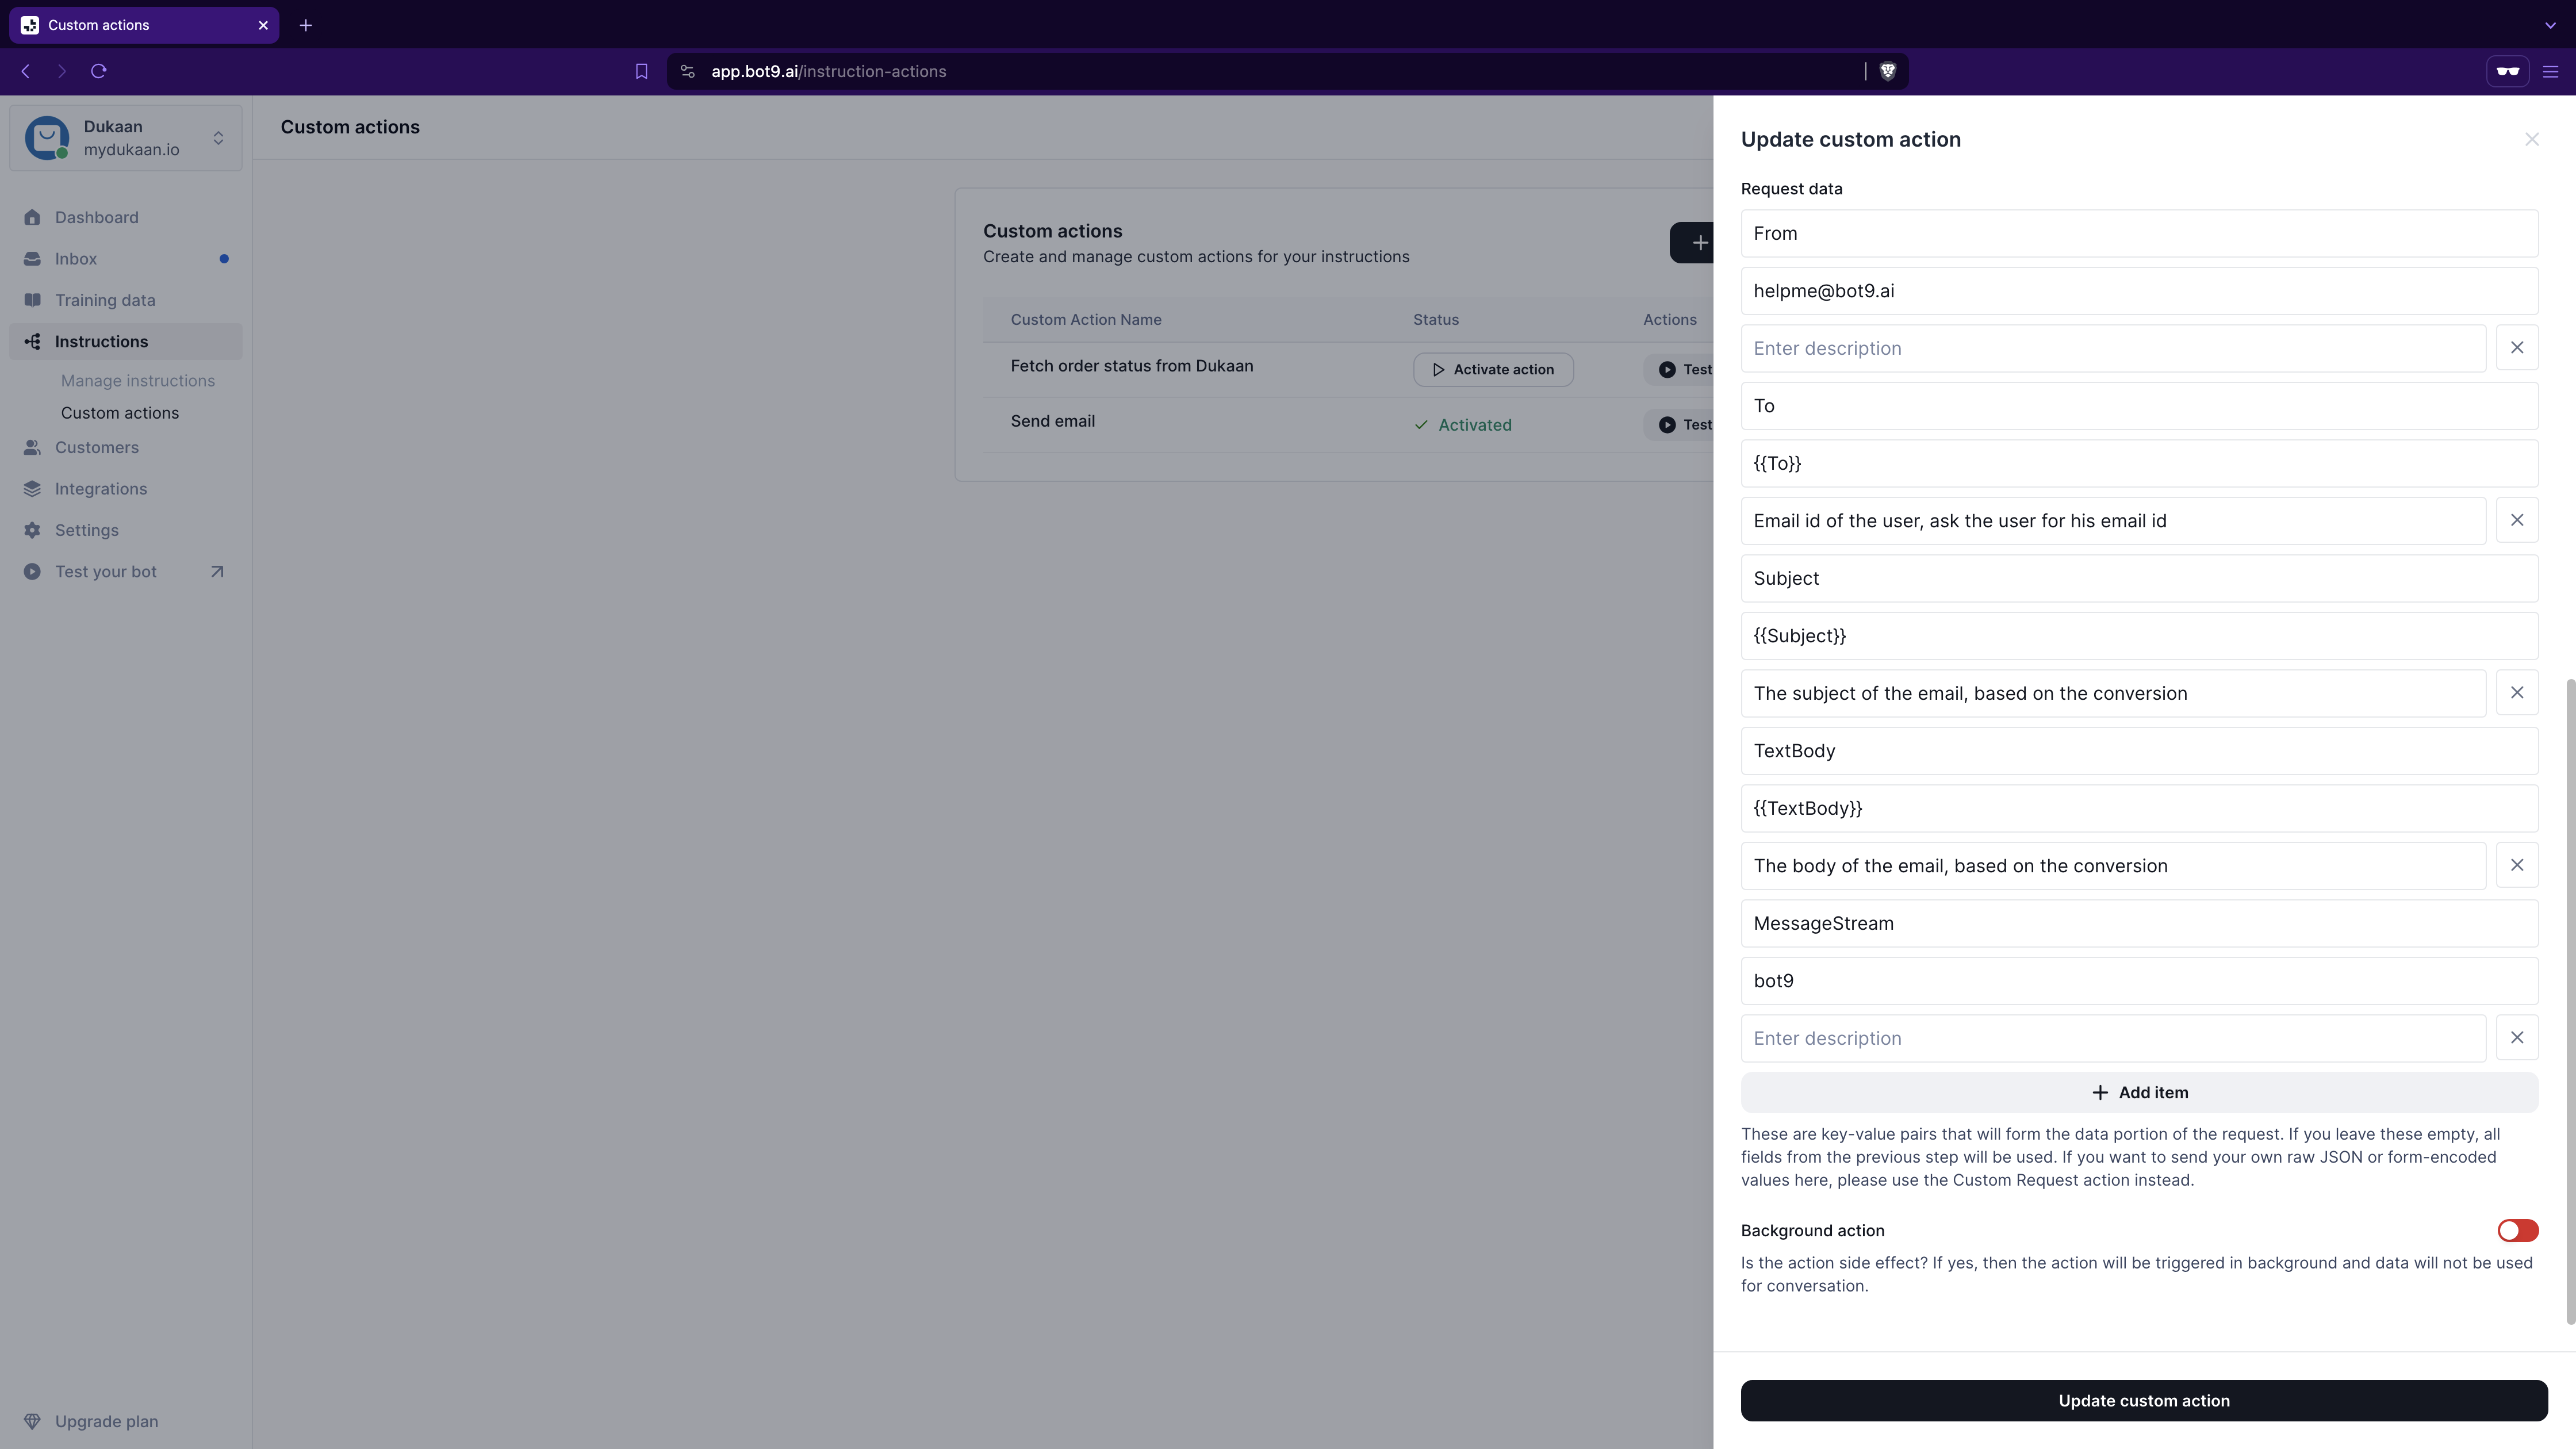
As you can figure out from the image below, variables are denoted by double curly braces, like {{To}}, {{Subject}}, and {{TextBody}}.

These variables are placeholders that get replaced with actual data when the custom action is executed. The benefit of using variables is that they allow the custom action to be dynamic and reusable. For example:
{{To}}: This would be replaced with the email address of the recipient.
{{Subject}}: This would be replaced with the subject line of the email, which could change based on the context of the conversation, which gets generated automatically.
{{TextBody}}: This would be replaced with the body content of the email, you can use description field to guide how you wish to generate the content, for example: One would write “summarize the conversation and use it as body” in description.
How to use variables:
Insert Variables in the Chatbot Flow: When setting up your chatbot's conversation flow, you can configure it to ask users for specific information, such as their email address. This information is then stored in variables.

Reference Variables in Custom Actions: In the custom action configuration, you reference these variables using the double curly brace syntax. The chatbot will replace the variables with the actual data it has collected during the conversation.
Benefits of using variables:
Personalization: You can personalize the emails sent by the bot based on the user's input or previous interactions.
Flexibility: Variables make the custom actions flexible, allowing you to use the same action in different scenarios without changing the underlying configuration.
Automation: By using variables, you can automate the process of sending tailored responses or information, thus increasing efficiency.
Remember to review and adhere to all API usage policies and secure handling of API keys when integrating with third-party services.
